No edit summary |
m (Corrected spelling/grammar) |
||
| Line 81: | Line 81: | ||
When engaging a Raijin, it is very important to consider weapon damage types. A bot equipped with Energy weapons will be at a drastic disadvantage when facing a Raijin, as the Raijin's shields will provide protection from plasma weapons. Explosive weapons, however, can bypass the shields and, as such, are generally more capable of fighting and destroying Raijins. Shotgun/kinetic weapons can also be effective against a Raijin, as due to a Raijin's relatively large frame and hit-box, some of the particles fired by a shotgun weapon will hit the Raijin, and kinetic weapons deal 200% damage to physical shields. |
When engaging a Raijin, it is very important to consider weapon damage types. A bot equipped with Energy weapons will be at a drastic disadvantage when facing a Raijin, as the Raijin's shields will provide protection from plasma weapons. Explosive weapons, however, can bypass the shields and, as such, are generally more capable of fighting and destroying Raijins. Shotgun/kinetic weapons can also be effective against a Raijin, as due to a Raijin's relatively large frame and hit-box, some of the particles fired by a shotgun weapon will hit the Raijin, and kinetic weapons deal 200% damage to physical shields. |
||
| − | Despite its large frame and below |
+ | Despite its large frame and below-average speed, the Raijin can be strong when it comes to close-range combat. This is not only due to its large health pool, but its ability gives it physical shielding and 30% more firepower, which allows it to inflict more overall damage, due to an increased damage output, and more durability against all but rocket-type weaponry. |
Overall, the Raijin is an excellent defense-oriented robot with a damage boost in bastion mode and respectable speed for a heavy robot, but using Bastion Mode requires careful thought, as the Raijin is immobile whilst using the ability, making the Raijin best suited as a mid-range robot providing support fire or as a close-range brawler optimised for defensive tactics. |
Overall, the Raijin is an excellent defense-oriented robot with a damage boost in bastion mode and respectable speed for a heavy robot, but using Bastion Mode requires careful thought, as the Raijin is immobile whilst using the ability, making the Raijin best suited as a mid-range robot providing support fire or as a close-range brawler optimised for defensive tactics. |
||
Revision as of 22:23, 7 May 2020
| THIS IS A COMMUNITY PAGE IT IS OPEN TO EDITS FROM ANYONE |  |

| “ | A walking fortress, Raijin is a mechanical embodiment of positional warfare and heavy armaments. Considerably outperforms any opponent at long-range gunfights
|
” |
- — in-game description
| {{{ID}}} | Raijin
|
| Purchase Information | 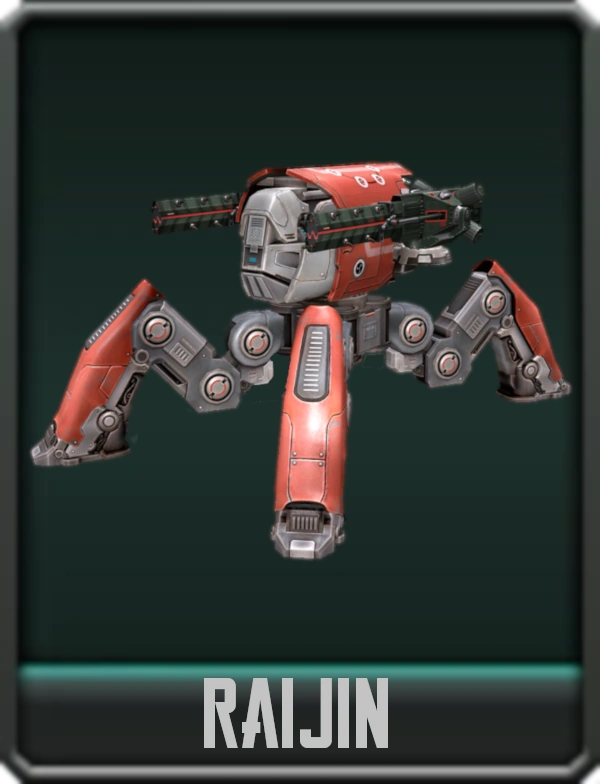
| ||||
|---|---|---|---|---|---|
| In-Game Cost | Real Value |
Exp Level | |||
| 4,000 |
$35 | 17 | |||
| Robot Information | |||||
| Class |
Ability |
Faction | |||
Heavy |
Bastion Mode |
DSC | |||
| Base Statistics | |||||
Level |
Durability |
Speed | |||
| 1 | 127,000 | 31 kph | |||
| Armaments | Standard Paint Jobs | ||||
| Hardpoints | 2× Heavy | ||||
| Default Weapons | 2× Nashorn | ||||
| Module Slots | Legendary Paint Jobs | ||||
| Active | Yes | coming soon | |||
| Passive | 1 | ||||
| Other | Legendary Pilots | ||||
| Tier |
~ | N/A | |||
| Wiki Class |
Heavy | ||||
| Potential Role | ~ | ||||
Introduction
The Raijin is a quadrupedal heavy robot with 2 heavy hardpoints.
Ability
This robot has a special ability, called Bastion Mode. When activated, it raises the Raijin's two shields (which resemble a pair of Ecus) while elevating its torso and gaining a 30% damage increase for each weapon separately.
This provides both protection and a better field-of-view to fire its weapons at the cost of the Raijin being unable to move. It can still move its tower, however.
Just like actual Écus, if enough damage is dealt to the shields they will eventually break, albeit the separate health pools usually cause them to break off one at a time. The shields do not protect the Raijin from splash damage, or sideways and vertical impacts from homing missiles such as Spirals and Hydras.
Strategy
The Raijin is the second most durable robot in the game with a health pool of 250,000 HP at level 12, surpassing even the Leo at 244,000 HP. It only loses to the Invader in terms of health, which maxes out 305,000 HP. It should also be noted that the Falcon has 308,760 HP when in damage reduction mode, surpassing both robots (the Raijin has 300,000 HP at level 12 MK2) but only 186,000 HP with its ability activated. Its pair of physical shields are also extremely durable (170,000 health each). With this, the Raijin has the highest combined health (all the robot's health as well as that of its shields) of all robots in the game.
At base level, it suffers from a rather slow speed. Because of this, it is often equipped with sniping weapons such as the Nashorn or Trebuchet, although it is generally much more effective as a mid-ranger with 2 Dragoons or Zeuses. They can occasionally be seen equipped with dual Thunders or Embers, as this setup can be effective at holding choke points on the smaller maps. Robots like the Fury, Natasha, Falcon, or the Butch do outgun it, but thanks to the Raijin's damage buff (+30%) in Bastion Mode, it can technically have the equivalent of a Natasha's firepower.
Although slow, the Bastion ability and large health pool can allow the Raijin to temporarily halt knife fighters, but due to its slow speed and extremely large size (it's the largest robot in the game), it is very vulnerable to splash damage. Raijin can ambush and fool bots into thinking it's a small bot due to its low hit box. If the Raijin is hiding behind cover and the legs of the Raijin are hidden, this makes an excellent strategy for the double-Thunder Raijin letting enemies get close to you by tricking them into thinking you are a small bot with low hp. However, this seldom works on maps with little cover (such as Canyon and Yamantau).
A particular advantage of the pilot activating Raijin's Bastion Mode is that the raising of the shields moves the enemy's target lock above the robot and its shields before they are fully raised. This causes the enemy robot to miss a few of its shots.
Like its counterpart Fujin, Raijin is a quadrupedal robot. This gives special characteristics that other bots do not have. Firstly, these two quadruped robots do not suffer from landing lag when they fall from a high place. Other bots are seen pausing as they absorb the shock, while the Fujin and Raijin do not. Secondly, Fujin and Raijin are significantly more maneuverable, able to change directions rapidly. This is because their legs allow them to move in any direction without turning, whereas other robots must rotate their lower bodies to the new direction. Interestingly, both the Raijin and the Fujin are low enough to be able to hit the Stalker whilst it is in stealth mode more successfully than other robots.
One of the most distinctive characteristics of the Rajin is that it has the ability to climb - an ability the Fujin does not use. This allows the Raijin to reach locations even jumping robots such as the Cossack, Griffin, Inquisitor, Spectre, and Rogatka cannot. However, this robot cannot climb 90-degree slopes, such as walls. You can, however, significantly slow your descent by continuously hugging the Raijin against a wall.
The Raijin has an extremely high health pool. As such, it can be a daunting opponent in a fight. When engaging the Raijin, it is recommended to always take into account the Raijin's weaponry. Due to the Raijin's average speed and relatively large hit-box, it is very easy to engage a Raijin at a range where its weapons perform sub-optimally (i.e. engaging a Raijin armed with dual Tridents at 300 meters).
When engaging a Raijin, it is very important to consider weapon damage types. A bot equipped with Energy weapons will be at a drastic disadvantage when facing a Raijin, as the Raijin's shields will provide protection from plasma weapons. Explosive weapons, however, can bypass the shields and, as such, are generally more capable of fighting and destroying Raijins. Shotgun/kinetic weapons can also be effective against a Raijin, as due to a Raijin's relatively large frame and hit-box, some of the particles fired by a shotgun weapon will hit the Raijin, and kinetic weapons deal 200% damage to physical shields.
Despite its large frame and below-average speed, the Raijin can be strong when it comes to close-range combat. This is not only due to its large health pool, but its ability gives it physical shielding and 30% more firepower, which allows it to inflict more overall damage, due to an increased damage output, and more durability against all but rocket-type weaponry.
Overall, the Raijin is an excellent defense-oriented robot with a damage boost in bastion mode and respectable speed for a heavy robot, but using Bastion Mode requires careful thought, as the Raijin is immobile whilst using the ability, making the Raijin best suited as a mid-range robot providing support fire or as a close-range brawler optimised for defensive tactics.
Possible Setups
Some effective builds for the Raijin are:
Close Range (350m or less)
| Slot Types → |
Heavy Slot 1 ↓ |
Heavy Slot 2 (Opt.1) ↓ |
Heavy Slot 2 (Opt. 2) ↓ | |
| #Slots → | x1 | x1 | x1 | Name (If Applicable) ↓ |
|
Setup 1 → |
 |
|
 |
Inferno(Opt. 1) |
|
Setup 2 → |
 |
|
|
Plasma Death Button (Opt. 1) |
| Setup 3 → |  |
|
Shotgun |
Mid-Range (500-600m)
| Slot Types → |
Heavy Slot 1 ↓ |
Heavy Slot 2 (Opt.1) ↓ |
Heavy Slot 2 (Opt. 2) ↓ | |
| #Slots → | x1 | x1 | x1 | Name (If Applicable) ↓ |
|
Setup 1 → |
 |
|
DD Smackdown | |
|
Setup 2 → |
 |
|
||
| Setup 3 → |  |
|
Russian Death Button | |
| Setup 4 → |  |
|
|
Leadhose (Opt. 1) |
Long Range (800-1,100m)
| Slot Types → | Heavy Slot ↓ | |
| #Slots → | x2 | Name (If Applicable) ↓ |
| Setup 1 → |  |
Gunship |
| Setup 2 → |  |
Christmas Tree |
| Setup 3 → |  |
Death Star |
Note: Although the Avenger has a range of 500m, it is most effective when used as a close-range weapon (due to bullet spread). Due to its outstandingly high damage however, it can fired at 500m and below whilst approaching the enemy robot(s).
Not Recommended
- Using an Ancile shield with any weapon other than the ones listed above, although it does allow for physical and energy shielding, it doesn't make up for the lack of firepower in most cases.
- Using Double Zenits is also not recommended due to relatively low damage and low accuracy. Unless in significant numbers (3+) or in combination with other weapons, Zenits aren't particularly useful in the current meta, but have their advantages in low-mid leagues.
- The use of Double Nashorns or Kang Daes is not recommended mainly because the Nashorn has lower burst DPS than a Trebuchet (which is the main sniping weapon in mid-high leagues), a much slower projectile speed and cannot bypass energy shields (which are also common in mid-high leagues). The Kang Dae, whilst more powerful and more commonly used, is nevertheless inferior to the Trebuchet for these reasons, but by less.
Mark I Statistics
Purchase Information
Level |
Cost | Durability |
Physical Shields (x2) |
Speed (kph) |
|---|---|---|---|---|
| 1 | 4,000 |
127,000 | 86,020 | 31 |
- This table shows the durability of each individual shield.
Upgrade Information
Level | Cost | Durability | Physical Shields (x2) | Speed (kph) | Time |
|---|---|---|---|---|---|
| 2 | 20,000 | 135,000 | 91,520 | 32 | 10 minutes |
| 3 | 40,000 | 144,000 | 97,370 | 33 | 1 hours |
| 4 | 80,000 | 153,000 | 103,590 | 33 | 2 hours |
| 5 | 400,000 | 163,000 | 110,210 | 34 | 8 hours |
| 6 | 800,000 | 173,000 | 117,250 | 34 | 12 hours |
| 7 | 1,600,000 | 184,000 | 124,740 | 35 | 1 day |
| 8 | 3,000,000 | 196,000 | 132,710 | 35 | 1 day 8 hours |
| 9 | 6,000,000 | 208,000 | 141,190 | 36 | 1 day 16 hours |
| 10 | 10,000,000 | 221,000 | 150,210 | 36 | 1 day 20 hours |
| 11 | 16,000,000 | 235,000 | 159,800 | 36 | 2 days 4 hours |
| 12 | 26,000,000 | 250,000 | 170,000 | 36 | 2 days 12 hours |
| Total | 63,940,000 | +123,000 | +83,980 | +5 | 11 days 11 hours 10 minutes |
- This table shows the durability of each individual shield.
Mark II Statistics
Purchase Information
Note: Level 12 Mark I is required to upgrade (purchase) to Mark II.
Level |
Cost | Durability |
Physical Shields (x2) |
Speed (kph) |
|---|---|---|---|---|
| 1 | 500 |
250,000 | 170,000 | 36 |
- This table shows the durability of each individual shield.
Upgrade Information
Level | Cost | Durability | Physical Shields (x2) | Speed (kph) | Time |
|---|---|---|---|---|---|
| 2 | 500,000 | 254,600 | 173,100 | 36 | 5 hours |
| 3 | 1,000,000 | 259,200 | 176,200 | 36 | 10 hours |
| 4 | 2,000,000 | 263,800 | 179,300 | 36 | 20 hours |
| 5 | 7,500,000 | 268,400 | 182,400 | 36 | 1 day 6 hours |
| 6 | 7,500,000 | 273,000 | 185,500 | 36 | 1 day 6 hours |
| 7 | 7,500,000 | 277,600 | 188,600 | 36 | 1 day 6 hours |
| 8 | 7,500,000 | 282,200 | 191,700 | 36 | 1 day 6 hours |
| 9 | 7,500,000 | 286,800 | 194,800 | 36 | 1 day 6 hours |
| 10 | 7,500,000 | 291,400 | 197,900 | 36 | 1 day 6 hours |
| 11 | 7,500,000 | 296,000 | 201,000 | 36 | 1 day 6 hours |
| 12 | 7,500,000 | 300,600 | 204,100 | 36 | 1 day 6 hours |
| Total | 63,500,000 | +50,600 | +34,100 | +0 | 11 days 11 hours |
- This table shows the durability of each individual shield.
Update History
| Version | Changes |
|---|---|
| 5.0 | Shield (x2) durability increased by 13% |
| 4.8.0 | Total Upgrade Time: 14 days 3 hours 10 minutes⟶11 days 11 hours 10 minutes |
| 4.7.0 | Total Upgrade Time: 17 days 3 hours 22 minutes⟶14 days 3 hours 10 minutes |
| 4.5 | Price changed from 4,000 gold to 3,500 gold (can no longer be produced via Workshop 2.0) |
| 4.2 | Price changed from 15,000 WP to 10,000 Components (valued at 4,000 gold) |
| 4.0 | Economy Changes (July 5): |
| Total Upgrade Cost: 40,549,000 Ag⟶63,940,000 Ag | |
| Total Upgrade Time: 26 days 15 hours 8 minutes 40 seconds⟶17 days 3 hours 22 minutes | |
| 3.3.0 | New Halloween skin (Black Widow) |
| 3.1 | +30% damage to each weapon when in Bastion mode |
| 3.0.1 | Speed increased by 10% |
| 1.9 | Bug fix: No longer has difficulties firing while under the cover of its shield. |
| 1.6.0 | Speed increased from 25 km/h to 33 km/h |
| Ability animation decreased to 2 seconds | |
| 1.4.0 | Robot was added to the game |
Paint Jobs Available For Purchase
")
")
Poll
Trivia
- The Raijin is one of the largest robots in the game - because of this, it is vulnerable to splash damage and weapons such as Thunders, Punishers, and Molots. The Fury also suffers from this problem
- This robot has the second largest health pool out of all the robots in the game. The Invader is the only robot with more health
- In addition to having the highest chassis HP, the Raijin has the highest combined HP (main body HP + shield HP) of all robots in the game
- Raijin is Japanese for “Thunder God”
- The Raijin, along with the Fūjin, was introduced on April 19, 2016
- The early prototype of the Raijin had a different design and was called the Bastion. The Raijin is a replacement/spiritual successor of this robot, as it features similar abilities and designs, as well as having a special ability called Bastion Mode. The canceled robot can still be seen in some trailers
- Raijin's initial name can be seen on the Pixonic Roboduck poster, and one can see that it was called "Bastion" on 1 April, just 18 days prior to the official release
- The Raijin is one of 5 robots that has a built-in Écu-like physical shield, the others being the Rhino, Lancelot, Galahad, Bulgasari and Gareth and one of the only 2 with multiple shields (Lancelot is the only other robot with multiple shields)
- The Raijin is one of five quadrupedal robots, the others being the Fujin, Weyland, Rayker, and Invader
- The Raijin is one of three robots that can climb up >90 and some 90 degree obstacles, the other two being the Weyland and the Rayker
- It is possible for a Raijin to lose one shield and have the other remain intact. In cases such as this, the pilot may easily tilt the robot a tiny bit so that the damage is still blocked by the remaining shield, but the pilot is still able able to shoot and hit the opponent. This way, the pilot can take full advantage of the shields
- Due to its body area being so wide, in the small tunnels and passageways like the ones on Moon or Shenzhen, the Raijin may block the area, preventing other robots from getting past and will have to wait for the Raijin to move out of the way
- The Raijin does not suffer from landing lag due to being a quadrupedal robot
- Due to its four legs, the Raijin can hang off the side of ledges without falling off. This can be used to gain a better vantage point for sniping or allow other bots to walk past you on a small path where you would otherwise block the way
- The Raijin has the words "thunder god" written in Japanese "雷神" in front of the shield when not in Bastion mode. It can easily be viewed in 3D mode in the hangar
- Raijins can perform several glitches. On the map Dead City, the can climb the invisible boundary at one side of the map. This grants it a high elevation to fire, but doing this will attract attention and will draw fire towards you. In Springfield, you will be able to climb up the mountains and the dam, giving you a better vantage point. But if you climb too high, you might fall out of the map and will not be able to return
- This robot is the only robot with the ability to increase its weapon's base damage whilst in a match
- This robot is one of 2 robots that can use an ability to raise a shield (or shields), with the other being the Rhino
- Despite being significantly larger than the bots mentioned below, the Raijin can still outrace Lancelots (without ability), Rhinos (without ability), Natashas, Leos, and Furies of the corresponding level, boasting a speed of 36 km/h at lv9
- It is possible to avoid sniper weapons such as the Trebuchet by activating the Bastion Mode ability right before your enemy fires. While the Raijin's target hit-box goes up immediately, the robot itself rises more slowly, so the shot passes overhead. This can also be accomplished by exiting bastion, though there is the risk of the shot striking the legs
- in some places in certain maps Raijin can climb 90 degree walls. With one of these places being Yamantau at one of the spawns
- Raijin has made a couple of appearances on the War Robots Logo App, equipped with a pair of Trebuchets
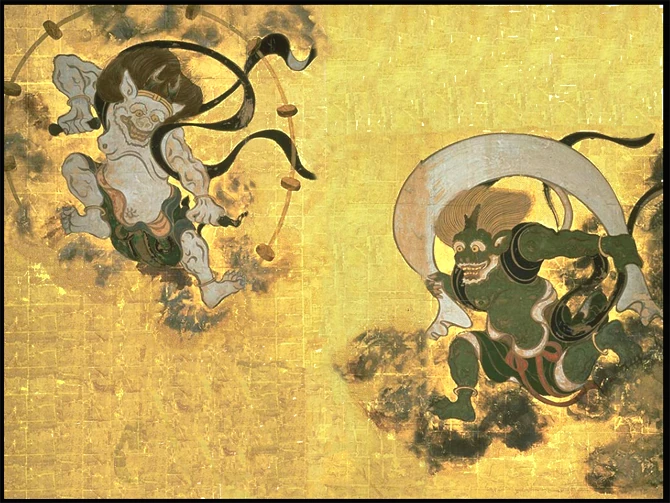
- The Fujin and the Raijin were portrayed by Ogata Korin on a picture
Raijin is the one of the bots from the Japanese faction

- Click here for a 3D image of this robot