| THIS IS A COMMUNITY PAGE IT IS OPEN TO EDITS FROM ANYONE |  |
- Main article: Maps
Introduction[]
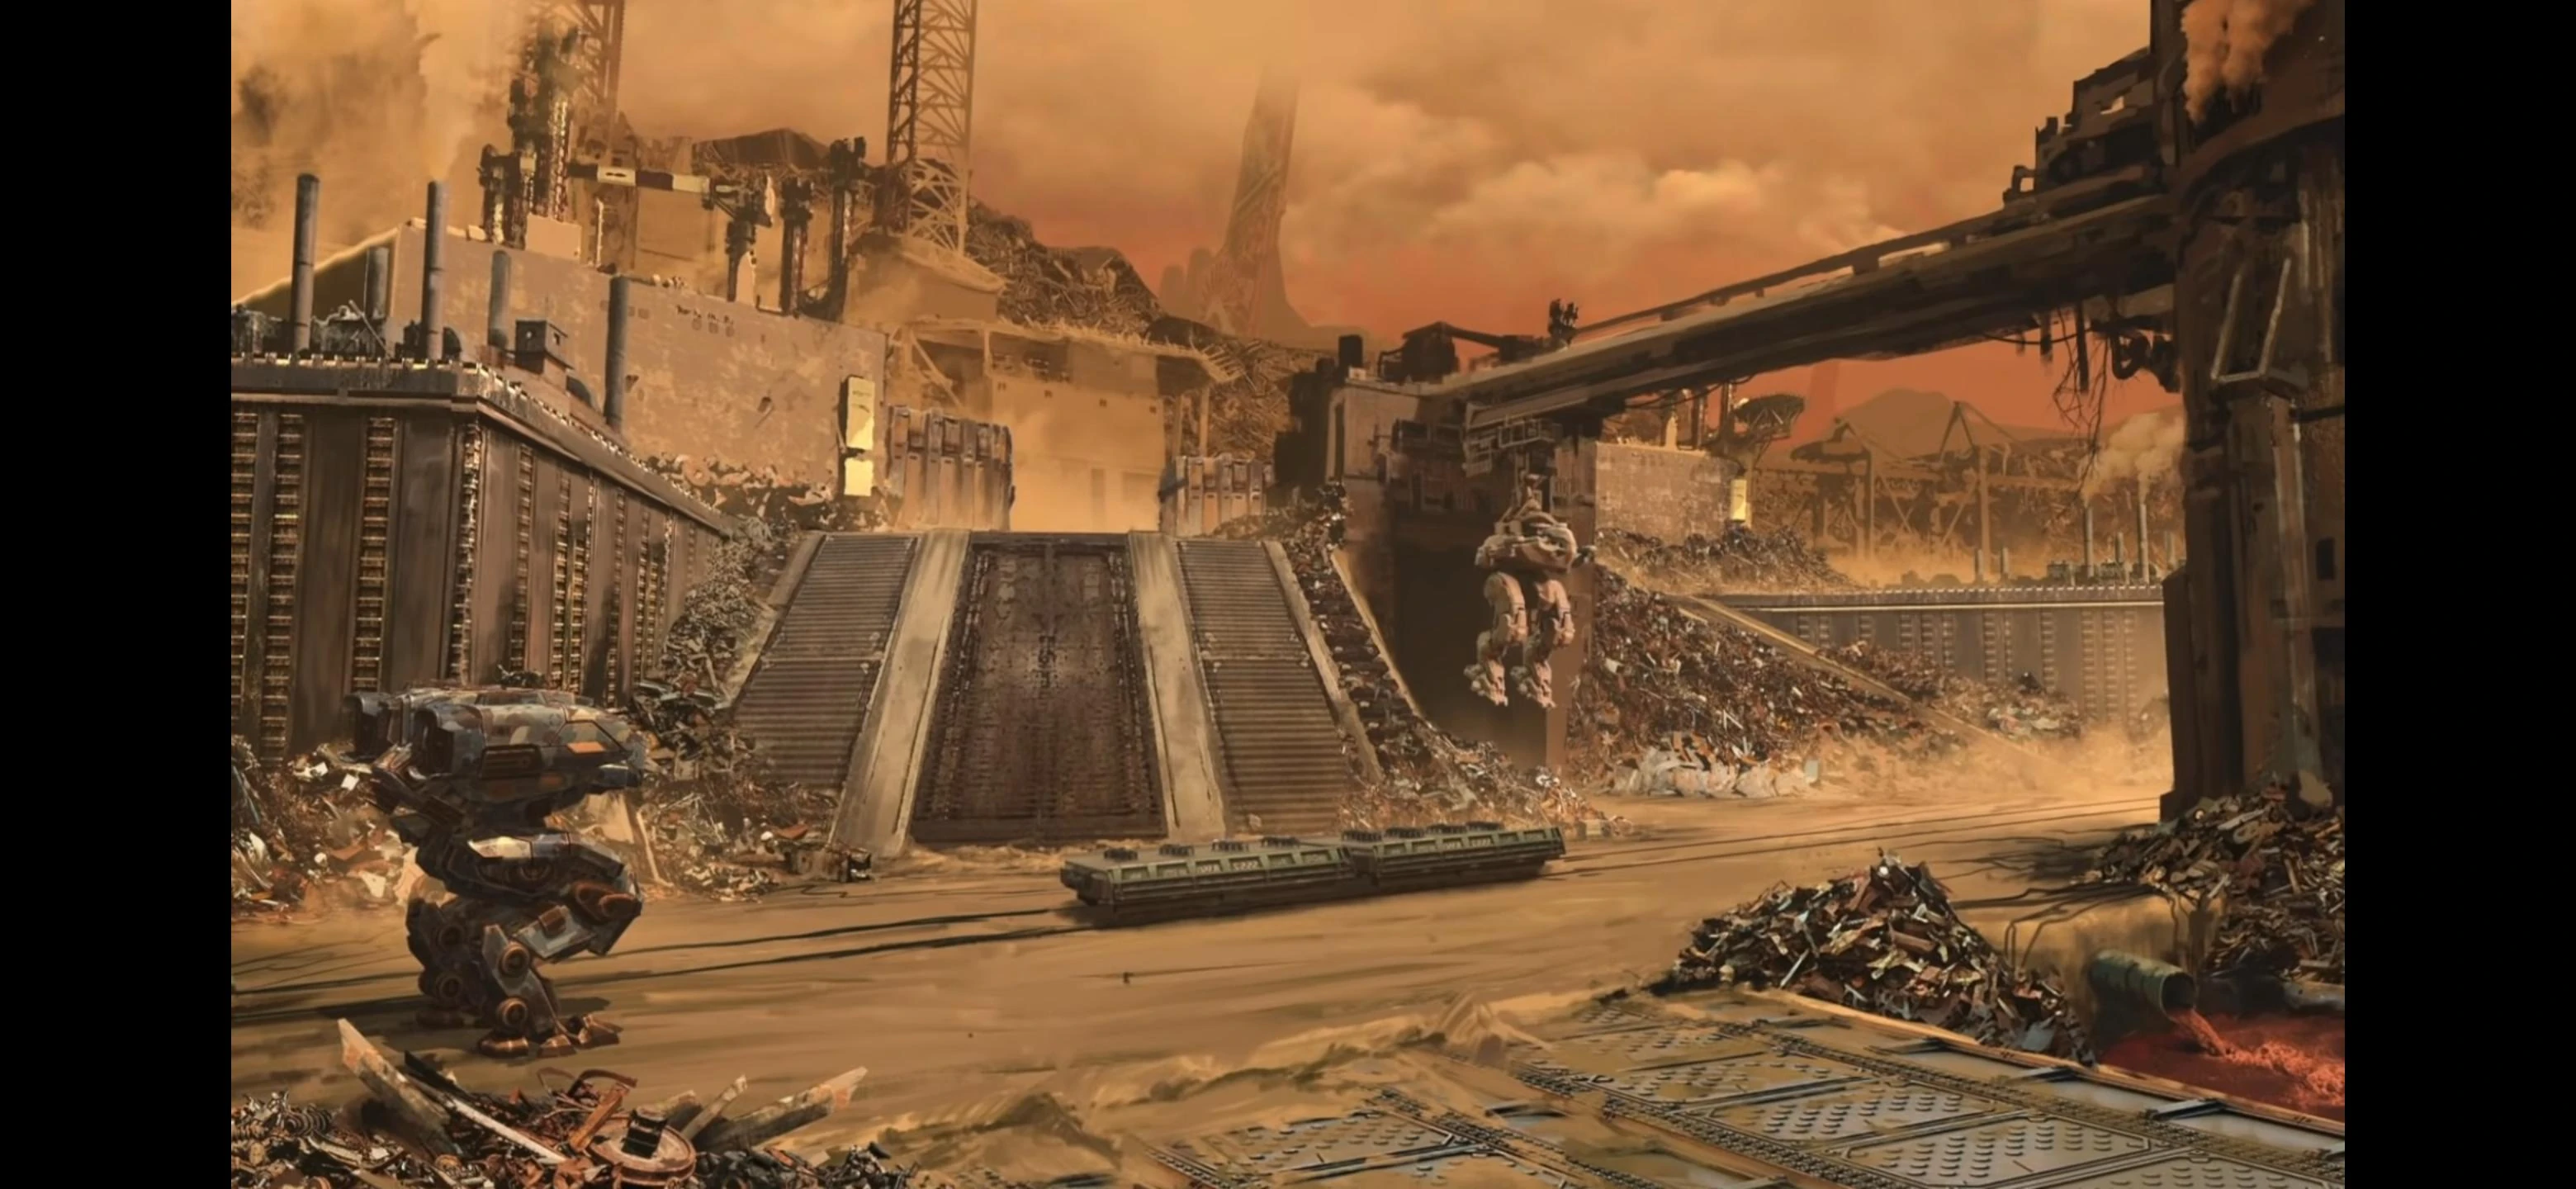
Factory is a map set in a large research complex in the middle of a desert surrounded by large walls. It features 5 beacons which are layed out in a triangular way, and its landscape is peppered with numerous buildings of various size.
The map's unique features are 7 pools of dark yellow acid which inflict approximately 6,250 damage per second to any robots which fall inside.
The many obstacles which have different sizes are spread relatively evenly across the map, making it well suited for close range brawling, fast-paced attacks and ambushes. This also reduces the threat posed by snipers. However, there are two elevated platforms at each end of the map, giving players with ranged setups a chance to rain fire on enemy robots from a distance, at the cost of being almost completely exposed to retaliation.
Factory map

Aerial blueprint of the map
General Tactics[]
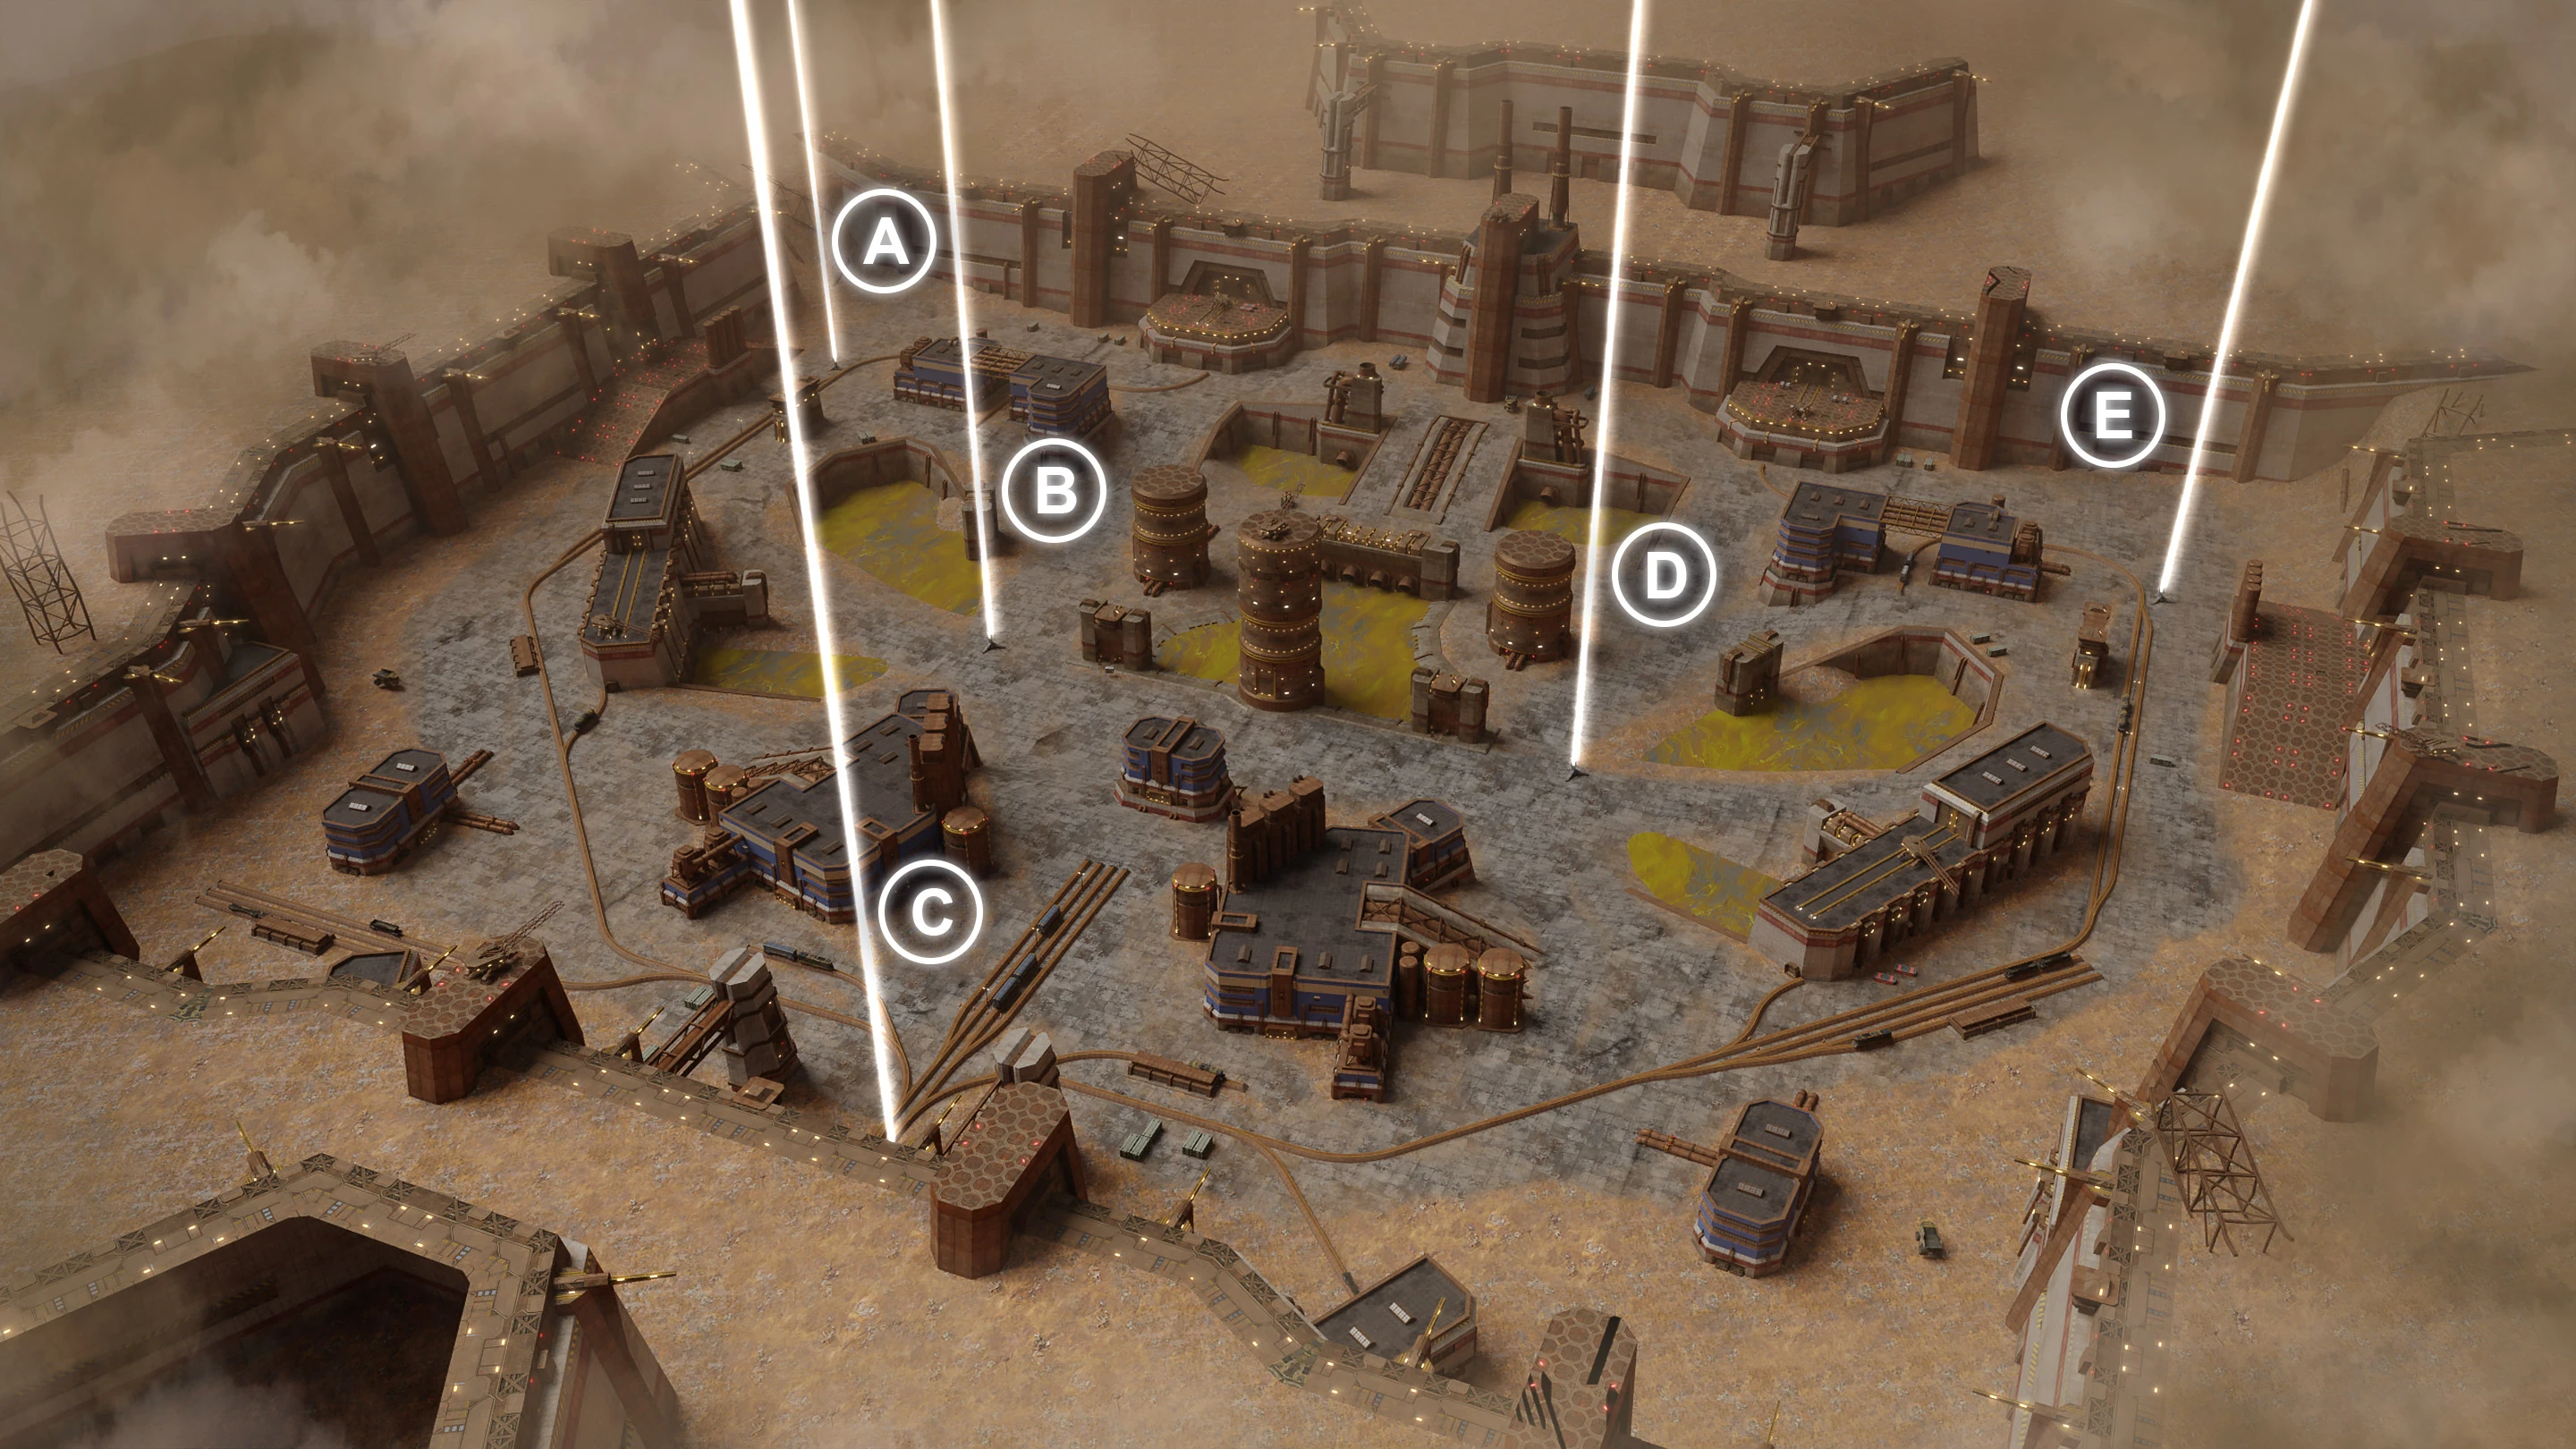
This map's abundance of cover and obstacles of varying sizes mean that it is oriented towards fast, mobile and well-armed robots. Robots with abilities that give them increased mobility are useful, though care must be taken to avoid the damaging pools of acid. Examples of such robots include the Haechi and Raven.
The elevated platform found next to Beacons A and E are perfect for snipers to provide support fire and deal heavy damage to enemy robots. The improved vantage point comes at the cost of protection however, with no obstacles to take cover behind, so players using it should be careful.
Unusually, the most often contested beacon (C) is not located in the centre of the map, but at the side. The area between Beacons B, C and D is likely to be the most fought-over position, although robots from each team can reach Beacon C by staying near the edge of the map.
The high-damage acid pools should be avoided at all costs, although a risky tactic would be to deliberately push an enemy robot into the hazard whilst firing to eliminate it more rapidly. Phase shift can be handy in this situation, if you are at low health yourself.
Audio[]
Layout[]

Factory Map Overview


Stand-Off Zones[]
What is a Stand-Off Zone?
Several maps contain a major "Stand-Off Zone". The standoff zone is an area in the map in which generally during the battle mode Team Deathmatch, the majority of robots and players take part in a never ending battle where they fight. This generally takes place between two spawn points very close to one another.
Although in most maps that feature a large open central area do not contain a major Stand-Off Zone. These maps have what is called a Common Zone in team deathmatch. General areas in which are considered sub Stand-Off Zones.
Map's most common Stand-Off Zone: Area under beacon C
Map's Common Zone(s): Area between beacons A and E, and between B and D
Trivia[]
- The damage dealt the the acid pool's did not increases the irreparable HP bar (represented by the grey bar on the health bar). Therefore, you could heal up all the damage received by the acid.
- By using this exploit to one's advantage, a pair or trio of high leveled Weylands sitting in an acid pool can outheal the amount of damage being dealt by the acid. Potentially farming large amounts of silver by healing each other simultaneously if they aren't killed by enemies or the acid itself.