No edit summary |
m (→Update History: fixed link) |
||
| (38 intermediate revisions by 10 users not shown) | |||
| Line 1: | Line 1: | ||
{{Protection}} |
{{Protection}} |
||
{{Currency|Type = "Au"}} |
{{Currency|Type = "Au"}} |
||
| − | {{quote|Remains lethal to enemies even after taking significant damage |
+ | {{quote|Robot is protected by a built-in energy shield. Remains lethal to enemies even after taking significant damage}} |
| + | <br /> |
||
| + | |||
| + | {{Unit Page Top |
||
| + | |Prev Unit = Rhino |
||
| ⚫ | |||
| + | |Next Unit = Fujin |
||
| + | |Mainpic = CarnageInfobox.png |
||
| + | |Cost = 4,000 {{Au icon}} |
||
| ⚫ | |||
| + | |Rlevel = 9 |
||
| + | |Class = [[File:MediumRobotinfobox.png|50px|link=]]<br>[[Medium Robot|Medium]] |
||
| + | |Ability = [[File:Rushinfobox.png|32px|link=]]<br>[[Abilities#Rush|Rush]] {{Info-Tooltip|Ability Tooltip}} |
||
| + | |Faction = [[File:DSCinfobox.png|36px|link=]]<br>[[New_Factions#Defense and Security Conglomerate (DSC)|DSC]] |
||
| ⚫ | |||
| ⚫ | |||
| + | |Speed = 30 kph |
||
| + | |3DModel = Link [https://sketchfab.com/3d-models/carnage-3d-2e3dfb0306c844e983b77160e2f9b228 here] (external site) |
||
| ⚫ | |||
| + | |WikiClass = Medium |
||
| + | |Paint = [[File:Carnage DEFAULT.png|60px|Default]] |
||
| + | |Paint2 = [[File:Carnage PREDATOR.png|60px|Predator|link=http://warrobots.wikia.com/wiki/Paint_Jobs#Predator]] |
||
| + | |Paint3 = [[File:Carnage COBRA.png|60px|Cobra|link=http://warrobots.wikia.com/wiki/Paint_Jobs#Cobra]] |
||
| + | |Paint4 = |
||
| + | |Paint5 = |
||
| + | |ActiveModule = Yes |
||
| + | |PassiveModule = 1 |
||
| + | |Pilot = N/A |
||
| + | |Weapons = 2× [[Thunder]] |
||
| + | |Currency = {{Au}} |
||
| ⚫ | |||
| ⚫ | |||
| + | <!-- |
||
{{Infobox robot |
{{Infobox robot |
||
| ⚫ | |||
| ⚫ | |||
| ⚫ | |||
| ⚫ | |||
| ⚫ | |||
| − | |imagecaption= |
||
| + | |shield = true |
||
| ⚫ | |||
| ⚫ | |||
| ⚫ | |||
| + | |imagecaption = 3D model [https://sketchfab.com/3d-models/carnage-3d-2e3dfb0306c844e983b77160e2f9b228 here] |
||
| ⚫ | |||
| ⚫ | |||
| ⚫ | |||
| + | |value = $35 |
||
| ⚫ | |||
| − | | |
+ | |level = 1 |
| ⚫ | |||
| ⚫ | |||
| − | | |
+ | |speed = 30 |
| + | |hardpoints = 2× [[Heavy]] |
||
| ⚫ | |||
| ⚫ | |||
| − | |level= 1 |
||
| − | |faction= [[Factions#Unaffiliated|Unaffiliated]] |
||
|weapons = 2× [[Thunder]] |
|weapons = 2× [[Thunder]] |
||
| + | |active = Yes |
||
| ⚫ | |||
| ⚫ | |||
| + | |faction = [[New_Factions#Defense and Security Conglomerate (DSC)|DSC]] |
||
| ⚫ | |||
}} |
}} |
||
| + | --> |
||
| − | |||
==Introduction== |
==Introduction== |
||
The '''Carnage''' is a [[Medium Robot|medium robot]] with 2 [[Heavy Weapon|heavy]] hardpoints. |
The '''Carnage''' is a [[Medium Robot|medium robot]] with 2 [[Heavy Weapon|heavy]] hardpoints. |
||
==Abilities== |
==Abilities== |
||
| − | This robot's '''Rush''' [[Abilities#Rush|ability]] increases its top speed by 66%. This allows the Carnage to reach a theoretical top speed of |
+ | This robot's '''Rush''' [[Abilities#Rush|ability]] increases its top speed by 66%. This allows the Carnage to reach a theoretical top speed of 60 km/h (max level), making it one of the fastest robots in the game. The speed boost lasts for 10 seconds, followed by a 20-second cool-down period. Well-timed Rush activation allows the Carnage to quickly close in on an enemy target, or to quickly retreat from danger and take cover. |
| − | The Carnage's built-in energy shield acts like an [[Ancile]], |
+ | The Carnage's built-in energy shield acts like an [[Ancile]], meaning it will block [[kinetic ]] weapons, but not [[energy]] weapons. Evading damage for a short time allows the shield to recharge and the Carnage to preserve its health. The shield can also protect teammates as well, making the Carnage a great robot to accompany when rushing down opponents. Also, like the Ancile it regenerates 3% of its capacity per second, and needs to regenerate to 20% capacity for the shield to reactivate. |
| − | The |
+ | The Carnage has lower durability and hit points (HP) than other brawlers such as the [[Lancelot]], [[Invader]], [[Fenrir|Fenrir,]] [[Bulwark]], and [[Falcon]]. The Carnage is best for capturing beacons and defending them, since it can deal significant damage at close range with the correct setups. |
==Strategy== |
==Strategy== |
||
| − | The Carnage can equip two [[heavy]] weapons and when purchased comes equipped with 2× [[Thunder]]s. This hardpoint configuration allows for |
+ | The Carnage can equip two [[heavy]] weapons and when purchased comes equipped with 2× [[Thunder]]s. This hardpoint configuration allows for close combat, medium-ranged fighting, or long-ranged sniping. |
| + | |||
| ⚫ | Despite its high potential firepower and modest speed the Carnage is fragile, having below average health even with the built-in shield. Because of this a Carnage with close range weapons should rely on surprise and hit-and-run tactics to take down its opponent. When piloted correctly a Carnage can flank opponents and brawl for short periods of times. Carnage can also be used as a medium-range or long-range support fighter as it can take advantage of its firepower from a safe distance. |
||
| ⚫ | The Carnage relies heavily on its two heavy weapons, rush ability, and shield defense system to compensate for its poor durability and mediocre mobility. With a max hp of 114,000 at level 12, it has one of the worst hit points of all medium robots in the game. In addition with a 40 km/h top speed it is also tied for the slowest medium robot (when not rushing). |
||
| ⚫ | Despite its high potential firepower and modest speed |
||
| + | The Carnage is vulnerable to energy weapons, so Trebuchets, Dragoons or Zeuses on a [[Raijin]], [[Fury]], or [[Butch]] are great counters to the Carnage in the middle leagues. Plasma ([[Taran]] / [[Magnum]] / [[Redeemer]]) performs well against the Carnage for close-in engagement. |
||
| ⚫ | The Carnage relies heavily on its |
||
| + | If using non-energy weapons against the Carnage it is recommended to use "Death Button" set ups ([[Orkan]] / [[Pinata]] / [[Cryo]]) to quickly destroy the energy shield and damage the robot from a relatively safe 300 meter distance. Thunders and [[Punisher]]s are also good ways to break the shield for teammates to damage the Carnage. |
||
| − | The Carnage should not be underestimated by its below-average health pool. Players confronting the Carnage should do so with great caution. The Carnage is very vulnerable to energy weapons, so Trebuchets, Dragoons or Zeuses on a [[Raijin]], [[Fury]], or [[Butch]] are great counters, as they can all deal devastating damage to the Carnage from long distances, as their weapons are also able to bypass energy shields. [[Shocktrain]]s and [[Scourge]]s, can heavily cripple it from mid-ranged distance. Plasma ([[Taran]]/[[Magnum]]/[[Redeemer]]) if played safe, can perform excellently against it. However, the player should be aware of the surroundings, as enemies tend to use the ability to flank or ambush from the behind. |
||
| + | '''Threat Measure''' |
||
| − | Using non-energy weapons against Carnage should be taken carefully, especially when the Rush ability is activated. A "Death Button" ([[Orkan]]/[[Pinata]]) setup can be used to quickly destroy the energy shield and damage the robot from a relatively safe 300 meter distance. Thunders, [[Punisher]]s, or any kind of kinetic weapon are excellent ways to break the shield for teammates to damage it, as the shield will usually catch all the bullets of the spread, maximizing the damage the weapons do to the shield. A Lancelot with Thunders and Orkans can use its Thunder to deplete the shield then use the Orkans to kill or do severe damage to the Carnage, but due to the low health, its most likely that the Carnage will be destroyed. |
||
| + | Carnage was one of the deadliest robots in the game when it first came out. It's vulnerable to energy weapons but its 2 Heavy Weapons, ancile shield, and rush ability allow it to quickly close ground and ambush enemy bots. It is a high threat in the lower-leagues and a moderate thread in the middle-leagues. |
||
| − | When fighting the Carnage with short-ranged setups, be sure to keep at least a 200-meter distance, especially when the Carnage is equipped with two Thunders. Failure to do so will result in the destruction/near-destruction of your robot. Be wary of the Rush ability, as the Carnage can use it to ambush from the behind, capture [[beacon]]s, or quickly close the distance between it and its target. |
||
==Possible Setups== |
==Possible Setups== |
||
| Line 51: | Line 85: | ||
===Close Range (350m or less)=== |
===Close Range (350m or less)=== |
||
| + | {{CollapseBeginClosed}} |
||
| − | |||
| − | <div |
+ | <div style="width:100%" data-expandtext="Open" data-collapsetext="Close"> |
{|border="1" |
{|border="1" |
||
|- |
|- |
||
| Line 72: | Line 106: | ||
|'''Setup 4 '''→ |
|'''Setup 4 '''→ |
||
|{{Setup|"Redeemer"}} |
|{{Setup|"Redeemer"}} |
||
| ⚫ | |||
| + | |'''Setup 3 '''→ |
||
| + | |{{Setup|"Glory"}} |
||
|- |
|- |
||
|'''Setup 5 '''→ |
|'''Setup 5 '''→ |
||
| Line 77: | Line 114: | ||
|} |
|} |
||
</div> |
</div> |
||
| + | {{CollapseEnd}} |
||
===Mid-Range (500-600m)=== |
===Mid-Range (500-600m)=== |
||
| + | {{CollapseBeginClosed}} |
||
| − | |||
| − | <div |
+ | <div style="width:100%" data-expandtext="Open" data-collapsetext="Close"> |
{|border="1" |
{|border="1" |
||
|- |
|- |
||
| Line 97: | Line 135: | ||
| |
| |
||
'''Setup 2 '''→ |
'''Setup 2 '''→ |
||
| + | |{{Setup|"Viper"}} |
||
| ⚫ | |||
| ⚫ | |||
| + | '''Setup 3 '''→ |
||
|{{Setup|"Zeus"}} |
|{{Setup|"Zeus"}} |
||
|} |
|} |
||
</div> |
</div> |
||
| + | {{CollapseEnd}} |
||
===Long Range (800-1,000m)=== |
===Long Range (800-1,000m)=== |
||
| + | {{CollapseBeginClosed}} |
||
| − | |||
| − | <div |
+ | <div style="width:100%" data-expandtext="Open" data-collapsetext="Close"> |
{|border="1" |
{|border="1" |
||
|- |
|- |
||
| Line 123: | Line 166: | ||
|} |
|} |
||
</div> |
</div> |
||
| + | {{CollapseEnd}} |
||
===Overview=== |
===Overview=== |
||
| + | The cheapest (since they already come on the robot), and one of the most effective load-outs for the Carnage are two Thunders. Thunders are very effective at close range and augment the Carnage's characteristics. |
||
| + | For mid-range the [[Dragoon]], [[Zeus]], and [[Tempest]] are the recommended set ups. The Dragoon and Zeus penetrate Ancile shields while the Tempests have a very high cycle DPS (damage per second). Dual [[Trident]]s can be a powerful setup due to dealing over 42,000 splash damage (when both are at max level) which are effective against bots close to corners or when tareting a cluster of enemy robots. |
||
| − | The cheapest (since they already come on the robot), and one of the most effective load-outs for the Carnage are the two Thunders. Thunders are very effective at close range, and in conjunction with the Carnage's characteristics, can turn it into a nightmare for enemies close up. It is possible to take out a "Death Button" setup, one of the most feared setups in the game. In addition, the placement of the Thunders – one on each side – makes use of cover viable. While this prevents the Carnage from utilizing the full firepower of two Thunders, the sheer firepower of a single Thunder at close-range is enough to finish off most targets quickly. |
||
| ⚫ | |||
| − | When using two Thunders, it is advised to not draw attention to yourself, as the Carnage's low health pool will make it much harder to kill an enemy when they are aware of your presence. Because of this, it is advised to not attempt to sneak around on open maps such as [[Yamantau]], [[Canyon]], or the river bed on [[Springfield]], where the robot is exposed and becomes easy prey for other robots with multiple Trebuchets, [[Gekko]]s, or Zeuses. |
||
| − | |||
| − | An expensive load-out is a Carnage with two [[Ember]]s. Embers change the battlefield as they are the second short-range heavy weapon, and one that surpasses physical and energy shields. With Embers it is possible to easily eliminate "Death Buttons" or plasma setups, being especially effective against the more common Thunder Carnage. And due to the height of the weapons on the Carnage, it is possible to deal an incredible amount of damage while behind cover. |
||
| − | |||
| − | For mid-range, the [[Dragoon]], [[Zeus]], and [[Tempest]] are the available options. The Dragoon and Zeus have the advantage of penetrating Ancile shields, which can be deadly to other Carnages. Tempests, have a very high cycle DPS (damage per second) for a mid-range weapon and are good for blasting off physical shields, depleting energy shields, and the overall destruction of robots from afar. Because of this, the Carnage is known to be very popular in all leagues, including even Legends League due to its ability to counter many different robots. |
||
| − | |||
| − | Dual [[Trident]]s can be a powerful setup, due to dealing over 42,000 damage (when both are at max level) around a corner. Firing at a cluster of enemy robots can increase that number significantly. However, the Trident build is highly situational, due to the popularity of Ancile shields, and agile robots, which can either ignore or evade an entire salvo of Trident rockets respectively. For these reasons it is not on the recommended list. |
||
| − | |||
| − | Equipped with a long-range weapon like [[Trebuchet]]s, the Carnage is less effective as it lacks the firepower or health of larger sniper robots such as the [[Fury]]. |
||
| − | |||
| ⚫ | |||
===Not Recommended=== |
===Not Recommended=== |
||
| Line 147: | Line 182: | ||
==Mark I Statistics== |
==Mark I Statistics== |
||
| + | {{Robot Upgrades |
||
| − | ===Purchase Information=== |
||
| + | |additional-columns = 1 |
||
| − | {| class="article-table" border="0" cellspacing="1" cellpadding="1" style="width:500px;" |
||
| + | |mark-2 = false |
||
| ⚫ | |||
| + | |purchase-currency = {{Table Currency|"Ag"}} |
||
| − | !Purchase<br />Level |
||
| + | |custom-ico-1 = [[File:EnergyShield.png|40px|link=]] |
||
| − | !Purchase<br />Cost |
||
| + | |custom-title-1 = Energy Shield |
||
| − | !Health |
||
| ⚫ | |||
| − | !Shield |
||
| ⚫ | |||
| − | !Speed (km/h) |
||
| ⚫ | |||
| ⚫ | |||
| ⚫ | |||
| ⚫ | |||
| ⚫ | |||
| − | |4,000 [[Au]] |
||
| ⚫ | |||
| ⚫ | |||
| ⚫ | |||
| − | |38,000 |
||
| ⚫ | |||
| − | |30 |
||
| ⚫ | |||
| − | |} |
||
| ⚫ | |||
| − | |||
| ⚫ | |||
| ⚫ | |||
| − | | |
+ | |12|121,000|74,000|40|26,000,000|2 days 12 hours |
| + | |total-upgrade-cost = 63,940,000 |
||
| ⚫ | |||
| + | |total-upgrade-time = 11 days, 11 hours, 10 minutes}} |
||
| ⚫ | |||
| ⚫ | |||
| ⚫ | |||
| ⚫ | |||
| ⚫ | |||
| ⚫ | |||
| ⚫ | |||
| ⚫ | |||
| ⚫ | |||
| − | |Total|+10|+59,000|+36,000|63,940,000|17 days 3 hours 22 minutes |
||
| ⚫ | |||
==Mark II Statistics== |
==Mark II Statistics== |
||
| + | {{Robot Upgrades |
||
| − | ===Purchase Information=== |
||
| + | |additional-columns = 1 |
||
| − | Note: Level 12 Mark I is required to upgrade (purchase) to Mark II. |
||
| + | |mark-2 = true |
||
| − | {| class="article-table" border="0" cellspacing="1" cellpadding="1" style="width:500px;" |
||
| + | |custom-ico-1 = [[File:EnergyShield.png|40px|link=]] |
||
| ⚫ | |||
| + | |custom-title-1 = Energy Shield |
||
| ⚫ | |||
| + | | 1|121,000|74,000|40|500 |
||
| − | !Cost |
||
| ⚫ | |||
| − | !Health |
||
| ⚫ | |||
| − | !Shield |
||
| ⚫ | |||
| − | !Speed (km/h) |
||
| ⚫ | |||
| ⚫ | |||
| ⚫ | |||
| − | |1 |
||
| ⚫ | |||
| − | |500 [[Au]] |
||
| ⚫ | |||
| − | |74,400 |
||
| ⚫ | |||
| − | |45,600 |
||
| + | |10|140,800|86,600|40|7,500,000|1 day 6 hours |
||
| − | |30 |
||
| ⚫ | |||
| − | |} |
||
| + | |12|145,200|89,400|40|7,500,000|1 day 6 hours |
||
| − | |||
| + | |total-upgrade-cost = 63,500,000 |
||
| − | {{robot-upgrades-mk2|Carnage |
||
| + | |total-upgrade-time = 11 days, 11 hours}} |
||
| ⚫ | |||
| ⚫ | |||
| ⚫ | |||
| ⚫ | |||
| − | |6|36|100,800|62,400|800,000|16 hours 48 minutes |
||
| ⚫ | |||
| ⚫ | |||
| ⚫ | |||
| ⚫ | |||
| ⚫ | |||
| ⚫ | |||
| − | |Total|+10|+70,800|+43,200|63,940,000|17 days 3 hours 22 minutes |
||
| − | }} |
||
| − | |||
==Update History== |
==Update History== |
||
| Line 218: | Line 230: | ||
!Changes |
!Changes |
||
|- |
|- |
||
| − | |[[Updates#Update 4. |
+ | |[[Updates#Update 4.8.0|4.8.0]] |
| + | |Total Upgrade Time: 14 days 3 hours 10 minutes⟶11 days 11 hours 10 minutes |
||
| ⚫ | |||
| + | |[[Updates#Update 4.7.0|4.7.0]] |
||
| + | |Total Upgrade Time: 17 days 3 hours 22 minutes⟶14 days 3 hours 10 minutes |
||
| ⚫ | |||
| + | |[[Updates#Update 4.5.0|4.5.0]] |
||
|Price changed from 3,500 gold to 4,000 gold (can no longer be produced via Workshop 2.0) |
|Price changed from 3,500 gold to 4,000 gold (can no longer be produced via Workshop 2.0) |
||
|- |
|- |
||
| − | |[[Updates#Update 4.3|4.3]] |
+ | |[[Updates#Update 4.3.0|4.3.0]] |
|Durability increased by 6% |
|Durability increased by 6% |
||
|- |
|- |
||
| Line 227: | Line 245: | ||
|Energy shield capacity increased by 9% |
|Energy shield capacity increased by 9% |
||
|- |
|- |
||
| − | |[[Updates#Update 4.2|4.2]] |
+ | |[[Updates#Update 4.2.0|4.2.0]] |
|Price changed from 13,000 WP to 10,000 Components (valued at 3,500 gold) |
|Price changed from 13,000 WP to 10,000 Components (valued at 3,500 gold) |
||
|- |
|- |
||
| − | |[[Updates#Update 4.0|4.0]] |
+ | |[[Updates#Update 4.0.0|4.0.0]] |
|Economy Changes (July 5): |
|Economy Changes (July 5): |
||
|- |
|- |
||
| Line 251: | Line 269: | ||
|Energy shield regeneration decreased to 3%. Also, now needs 20% instead of 10% in order to reactivate when eliminated |
|Energy shield regeneration decreased to 3%. Also, now needs 20% instead of 10% in order to reactivate when eliminated |
||
|- |
|- |
||
| − | |[[Updates#Update 2.5|2.5]] |
+ | |[[Updates#Update 2.5.0|2.5.0]] |
|New skin |
|New skin |
||
|- |
|- |
||
| Line 260: | Line 278: | ||
|Ability cooldown decreased from 30 seconds to 20 seconds |
|Ability cooldown decreased from 30 seconds to 20 seconds |
||
|- |
|- |
||
| − | |[[Updates#Update 1.1|1.1]] |
+ | |[[Updates#Update 1.1.0|1.1.0]] |
|Robot was added to the game |
|Robot was added to the game |
||
|} |
|} |
||
| Line 275: | Line 293: | ||
==Trivia== |
==Trivia== |
||
| ⚫ | |||
| − | *The Carnage, [[Haechi]], [[Fujin]], and [[Bulwark]] are the only robots to have a built-in energy shield. |
||
| ⚫ | |||
| − | *The Carnage is tied with the [[Patton]] for the slowest medium robot at 40 km/h, when not rushing. |
||
| ⚫ | |||
| ⚫ | |||
| ⚫ | |||
| ⚫ | |||
| + | *Click [https://sketchfab.com/3d-models/carnage-3d-2e3dfb0306c844e983b77160e2f9b228 here] for a 3D image of this robot |
||
| ⚫ | |||
| + | |||
| ⚫ | |||
| + | ==Navigation== |
||
| + | {{Units}} |
||
| + | [[Category:A to Z]] |
||
Revision as of 18:10, 26 May 2020
| THIS IS A COMMUNITY PAGE IT IS OPEN TO EDITS FROM ANYONE |  |

| “ | Robot is protected by a built-in energy shield. Remains lethal to enemies even after taking significant damage
|
” |
- — in-game description
| {{{ID}}} | Carnage
|
| Purchase Information | 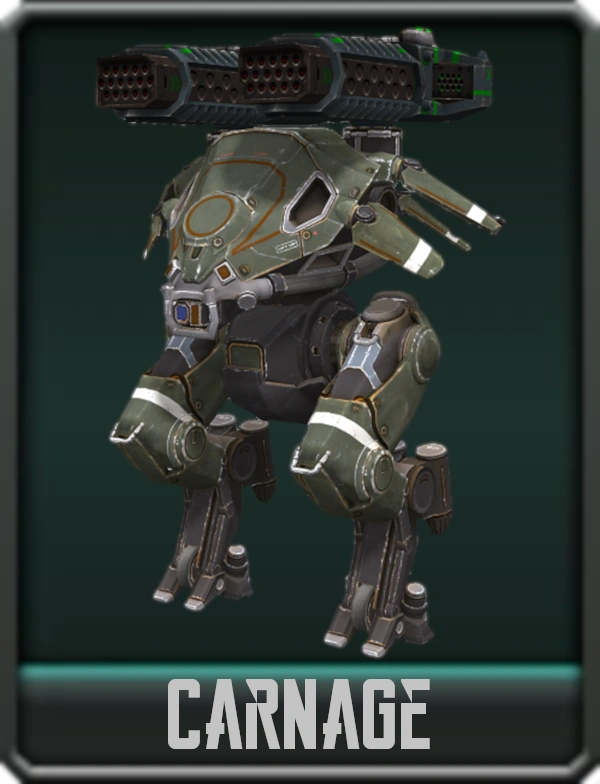
| ||||
|---|---|---|---|---|---|
| In-Game Cost | Real Value |
Exp Level | |||
| 4,000 |
$35 | 9 | |||
| Robot Information | |||||
| Class |
Ability |
Faction | |||
Medium |
Rush |
DSC | |||
| Base Statistics | |||||
Level |
Durability |
Speed | |||
| 1 | 62,000 | 30 kph | |||
| Armaments | Standard Paint Jobs | ||||
| Hardpoints | 2× Heavy | ||||
| Default Weapons | 2× Thunder | ||||
| Module Slots | Legendary Paint Jobs | ||||
| Active | Yes | coming soon | |||
| Passive | 1 | ||||
| Other | Legendary Pilots | ||||
| Tier |
~ | N/A | |||
| Wiki Class |
Medium | ||||
| Potential Role | ~ | ||||
Introduction
The Carnage is a medium robot with 2 heavy hardpoints.
Abilities
This robot's Rush ability increases its top speed by 66%. This allows the Carnage to reach a theoretical top speed of 60 km/h (max level), making it one of the fastest robots in the game. The speed boost lasts for 10 seconds, followed by a 20-second cool-down period. Well-timed Rush activation allows the Carnage to quickly close in on an enemy target, or to quickly retreat from danger and take cover.
The Carnage's built-in energy shield acts like an Ancile, meaning it will block kinetic weapons, but not energy weapons. Evading damage for a short time allows the shield to recharge and the Carnage to preserve its health. The shield can also protect teammates as well, making the Carnage a great robot to accompany when rushing down opponents. Also, like the Ancile it regenerates 3% of its capacity per second, and needs to regenerate to 20% capacity for the shield to reactivate.
The Carnage has lower durability and hit points (HP) than other brawlers such as the Lancelot, Invader, Fenrir, Bulwark, and Falcon. The Carnage is best for capturing beacons and defending them, since it can deal significant damage at close range with the correct setups.
Strategy
The Carnage can equip two heavy weapons and when purchased comes equipped with 2× Thunders. This hardpoint configuration allows for close combat, medium-ranged fighting, or long-ranged sniping.
Despite its high potential firepower and modest speed the Carnage is fragile, having below average health even with the built-in shield. Because of this a Carnage with close range weapons should rely on surprise and hit-and-run tactics to take down its opponent. When piloted correctly a Carnage can flank opponents and brawl for short periods of times. Carnage can also be used as a medium-range or long-range support fighter as it can take advantage of its firepower from a safe distance.
The Carnage relies heavily on its two heavy weapons, rush ability, and shield defense system to compensate for its poor durability and mediocre mobility. With a max hp of 114,000 at level 12, it has one of the worst hit points of all medium robots in the game. In addition with a 40 km/h top speed it is also tied for the slowest medium robot (when not rushing).
The Carnage is vulnerable to energy weapons, so Trebuchets, Dragoons or Zeuses on a Raijin, Fury, or Butch are great counters to the Carnage in the middle leagues. Plasma (Taran / Magnum / Redeemer) performs well against the Carnage for close-in engagement.
If using non-energy weapons against the Carnage it is recommended to use "Death Button" set ups (Orkan / Pinata / Cryo) to quickly destroy the energy shield and damage the robot from a relatively safe 300 meter distance. Thunders and Punishers are also good ways to break the shield for teammates to damage the Carnage.
Threat Measure
Carnage was one of the deadliest robots in the game when it first came out. It's vulnerable to energy weapons but its 2 Heavy Weapons, ancile shield, and rush ability allow it to quickly close ground and ambush enemy bots. It is a high threat in the lower-leagues and a moderate thread in the middle-leagues.
Possible Setups
Some effective builds for the Carnage are:
Note: Each slot type is filled with only one particular weapon. For example, if a robot has 3 light all three of those slots are filled with Pinatas, as mixing weapons of the same slot type is not advisable.
Close Range (350m or less)
| Slot Types → | Heavy Slot ↓ |
| #Slots → | x2 |
| Setup 1 → |  |
| Setup 2 → |  |
| Setup 3 → |  |
| Setup 4 → |  |
| Setup 3 → | |
| Setup 5 → |  |
Mid-Range (500-600m)
| Slot Types → |
Heavy Slot ↓ |
| #Slots → | x2 |
|
Setup 1 → |
 |
|
Setup 2 → |
 |
|
Setup 3 → |
 |
Long Range (800-1,000m)
| Slot Types → |
Heavy Slot ↓ |
| #Slots → | x2 |
|
Setup 1 → |
 |
|
Setup 2 → |
 |
Overview
The cheapest (since they already come on the robot), and one of the most effective load-outs for the Carnage are two Thunders. Thunders are very effective at close range and augment the Carnage's characteristics.
For mid-range the Dragoon, Zeus, and Tempest are the recommended set ups. The Dragoon and Zeus penetrate Ancile shields while the Tempests have a very high cycle DPS (damage per second). Dual Tridents can be a powerful setup due to dealing over 42,000 splash damage (when both are at max level) which are effective against bots close to corners or when tareting a cluster of enemy robots.
The Carnage is a versatile robot which works well in many roles in the lower leagues.
Not Recommended
- The use of Double Nashorns or Kang Daes is not recommended mainly because the Nashorn has lower burst DPS than a Trebuchet (which is the main sniping weapon in mid-high leagues), a much slower projectile speed and cannot bypass energy shields (which are also common in mid-high leagues). The Kang Dae, while more powerful and more commonly used, is nevertheless inferior to the other mid to long range setups.
Mark I Statistics
Purchase Information
Level |
Durability |
Energy Shield |
Speed |
Cost |
|---|---|---|---|---|
| 1 | 62,000 | 38,000 | 30 | 4,000 |
Upgrade Information
Level |
Durability |
Energy Shield |
Speed |
Cost |
Time |
|---|---|---|---|---|---|
| 2 | 66,000 | 40,000 | 32 | 20,000 | 10 minutes |
| 3 | 70,000 | 43,000 | 33 | 40,000 | 1 hours |
| 4 | 74,000 | 46,000 | 34 | 80,000 | 2 hours |
| 5 | 79,000 | 49,000 | 35 | 400,000 | 8 hours |
| 6 | 84,000 | 52,000 | 36 | 800,000 | 12 hours |
| 7 | 89,000 | 55,000 | 38 | 1,600,000 | 1 day |
| 8 | 95,000 | 58,000 | 39 | 3,000,000 | 1 day 8 hours |
| 9 | 101,000 | 62,000 | 40 | 6,000,000 | 1 day 16 hours |
| 10 | 107,000 | 66,000 | 40 | 10,000,000 | 1 day 20 hours |
| 11 | 114,000 | 70,000 | 40 | 16,000,000 | 2 days 4 hours |
| 12 | 121,000 | 74,000 | 40 | 26,000,000 | 2 days 12 hours |
| Cost | Time | |
|---|---|---|
| Totals | 63,940,000 | 11 days, 11 hours, 10 minutes |
Mark II Statistics
Purchase Information
Level |
Durability |
Energy Shield |
Speed |
Cost |
|---|---|---|---|---|
| 1 | 121,000 | 74,000 | 40 | 500 |
Note: Level 12 Mark I is required to enhance (purchase) to Mark II.
Upgrade Information
Level |
Durability |
Energy Shield |
Speed |
Cost |
Time |
|---|---|---|---|---|---|
| 2 | 123,200 | 75,400 | 40 | 500,000 | 5 hours |
| 3 | 125,400 | 76,800 | 40 | 1,000,000 | 10 hours |
| 4 | 127,600 | 78,200 | 40 | 2,000,000 | 20 hours |
| 5 | 129,800 | 79,600 | 40 | 7,500,000 | 1 day 6 hours |
| 6 | 132,000 | 81,000 | 40 | 7,500,000 | 1 day 6 hours |
| 7 | 134,200 | 82,400 | 40 | 7,500,000 | 1 day 6 hours |
| 8 | 136,400 | 83,800 | 40 | 7,500,000 | 1 day 6 hours |
| 9 | 138,600 | 85,200 | 40 | 7,500,000 | 1 day 6 hours |
| 10 | 140,800 | 86,600 | 40 | 7,500,000 | 1 day 6 hours |
| 11 | 143,000 | 88,000 | 40 | 7,500,000 | 1 day 6 hours |
| 12 | 145,200 | 89,400 | 40 | 7,500,000 | 1 day 6 hours |
| Cost | Time | |
|---|---|---|
| Totals | 63,500,000 | 11 days, 11 hours |
Update History
| Version | Changes |
|---|---|
| 4.8.0 | Total Upgrade Time: 14 days 3 hours 10 minutes⟶11 days 11 hours 10 minutes |
| 4.7.0 | Total Upgrade Time: 17 days 3 hours 22 minutes⟶14 days 3 hours 10 minutes |
| 4.5.0 | Price changed from 3,500 gold to 4,000 gold (can no longer be produced via Workshop 2.0) |
| 4.3.0 | Durability increased by 6% |
| Energy shield capacity increased by 9% | |
| 4.2.0 | Price changed from 13,000 WP to 10,000 Components (valued at 3,500 gold) |
| 4.0.0 | Economy Changes (July 5): |
| Total Upgrade Cost: 31,543,000 Ag⟶63,940,000 Ag | |
| Total Upgrade Time: 19 days 23 hours 46 minutes 40 seconds⟶17 days 3 hours 22 minutes | |
| 3.0.1 | Energy shield now has the same 10% activation threshold and 3% per second regeneration rate as usual Ancile |
| 2.9.0 | New skin |
| 2.6.2 | Bug fix: Energy shield no longer takes double damage |
| Energy shield regeneration decreased to 3%. Also, now needs 20% instead of 10% in order to reactivate when eliminated | |
| 2.5.0 | New skin |
| 1.6.0 | Speed increased from 35 km/h to 40 km/h |
| Ability cooldown decreased from 30 seconds to 20 seconds | |
| 1.1.0 | Robot was added to the game |
Paint Jobs Available For Purchase
")
")
Poll
Trivia
- When first released, the Carnage would light up green when Rush Mode was activated. This green light was later changed to the current orange color
- The Carnage can boost into one of the fastest robots in the game when rushing at level 12, surpassing the speed of even a level 12 Stalker with a speed difference of +/- 0.6 km/h. However, after the addition of the Hellburner, it is no longer the fastest bot with abilities considered
- It is of many people's opinion that this robot looks like the Predator from the Predator series of movies
- The definition of carnage is the killing of large amounts of people
- Click here for a 3D image of this robot