Tag: Source edit |
No edit summary |
||
| (64 intermediate revisions by 25 users not shown) | |||
| Line 1: | Line 1: | ||
{{Protection}} |
{{Protection}} |
||
| + | {{Tab-1x2 |
||
| + | |Tab 1= Behemoth |
||
| + | |Label 1=Behemoth |
||
| + | |Tab 2=Behemoth/Ardent Behemoth |
||
| + | |Label 2=Ardent Behemoth |
||
| + | }} |
||
{{Currency|Type = "Au/Cp"}} |
{{Currency|Type = "Au/Cp"}} |
||
{{quote|The first robot able to fire 4 heavy weapons simultaneously. Developed by the DSC corporation, it's the true embodiment of unparalleled firepower}} |
{{quote|The first robot able to fire 4 heavy weapons simultaneously. Developed by the DSC corporation, it's the true embodiment of unparalleled firepower}} |
||
<br /> |
<br /> |
||
| + | {{Quick Nav|Prev = Fenrir|Next = Phantom}} |
||
| − | |||
{{Unit Page Top |
{{Unit Page Top |
||
| + | |ID = 55 |
||
|Prev Unit = Fenrir |
|Prev Unit = Fenrir |
||
|Unit Name = Behemoth |
|Unit Name = Behemoth |
||
| Line 10: | Line 17: | ||
|Mainpic = BehemothInfobox.png |
|Mainpic = BehemothInfobox.png |
||
|Cost = 10,000 {{Cp icon}} or<br>14,000 {{Au icon}} |
|Cost = 10,000 {{Cp icon}} or<br>14,000 {{Au icon}} |
||
| − | |Value = $ |
+ | |Value = $140 |
|Rlevel = 20 |
|Rlevel = 20 |
||
|Class = [[File:MediumRobotinfobox.png|50px|link=]]<br>[[Medium Robot|Medium]] |
|Class = [[File:MediumRobotinfobox.png|50px|link=]]<br>[[Medium Robot|Medium]] |
||
|Ability = [[File:SiegeModeinfobox.png|32px|link=]]<br>[[Abilities#Siege Mode|Siege Mode]] {{Info-Tooltip|Ability Tooltip}} |
|Ability = [[File:SiegeModeinfobox.png|32px|link=]]<br>[[Abilities#Siege Mode|Siege Mode]] {{Info-Tooltip|Ability Tooltip}} |
||
| − | |Faction = [[File:DSCinfobox.png|36px|link=]]<br>[[ |
+ | |Faction = [[File:DSCinfobox.png|36px|link=]]<br>[[Factions/DSC|DSC]] |
|Level = 1 |
|Level = 1 |
||
|Hit Points = 128,380 |
|Hit Points = 128,380 |
||
| Line 21: | Line 28: | ||
|Tier = IV |
|Tier = IV |
||
|WikiClass = [[Heavy Robot|Heavy]] |
|WikiClass = [[Heavy Robot|Heavy]] |
||
| + | |Role = [[Roles|Attacker]] |
||
|Paint = [[File:Behemoth_DEFAULT.png|60px|Default]] |
|Paint = [[File:Behemoth_DEFAULT.png|60px|Default]] |
||
| − | |Paint2 = [[File:Behemoth_LOADER.png|60px|Loader| |
+ | |Paint2 = {{Paint Tooltip|[[File:Behemoth_LOADER.png|60px|Loader]]|[[File:Behemoth_Loader.gif|400px]]}} |
|Paint3 = |
|Paint3 = |
||
|Paint4 = |
|Paint4 = |
||
| Line 30: | Line 38: | ||
|ActiveModule = Yes |
|ActiveModule = Yes |
||
|PassiveModule = 3 |
|PassiveModule = 3 |
||
| − | |Pilot = |
+ | |Pilot = {{Pilot Tooltip|Andrey Kvasov}} |
|Weapons = 4x [[Kang Dae]] |
|Weapons = 4x [[Kang Dae]] |
||
|Currency = {{Cp}} |
|Currency = {{Cp}} |
||
| Line 44: | Line 52: | ||
{{Tocright}} |
{{Tocright}} |
||
==Introduction== |
==Introduction== |
||
| − | The '''Behemoth''' is a |
+ | The '''Behemoth''' is a medium robot with 4 heavy hardpoints. It is unofficially classified as a heavy robot based on wiki [[War_Robots_Wiki:Robot_Classification_Criteria|criteria]]. Despite the high health and the high firepower, the behemoth is a slow target.. |
| − | |||
| − | The Behemoth is a formidable fighter at long and medium distances, but its lack of mobility and relatively low defense makes it vulnerable to short-range combat engagement. |
||
| − | |||
| − | The Behemoth closely resembles the fan-submitted concept by the name of “Sledge”. |
||
==Abilities== |
==Abilities== |
||
| − | This robot's ability is named |
+ | This robot's ability is named [[abilities#Siege Mode|Siege Mode]]. Upon activation, Behemoth becomes 50% slower, and moves its 2 heavy Weapons in the middle upright to it's firing position, being able to fire 4 heavy weapons simultaneously after 3 seconds of the ability activation. 4 heavy weapons is unprecedented in War Robots, providing high damage output, sometimes even being able to ''one-shot kill'' enemies with high damage per shot weapons such as the [[Thunder]], [[Glory]], [[Devastator]], [[Stake]], [[Brisant]], [[Trebuchet]], [[Zeus]], [[Thermite]], [[Dragoon]], [[Redeemer]], [[Gauss]], [[Decay]] and [[Hornet]]. |
| − | The deactivation of the ability takes 3 seconds, in reverse order: upon deactivating, Behemoth loses the ability to fire its 2 middle heavy weapons, then 3 seconds later Behemoth is mobile again. |
+ | The deactivation of the ability takes 3 seconds, in reverse order: upon deactivating, Behemoth loses the ability to fire its 2 middle heavy weapons, then 3 seconds later Behemoth is more mobile again. |
==Strategy== |
==Strategy== |
||
| − | Behemoth has high health and immense |
+ | Behemoth has high health and immense firepower, so players engaging an enemy Behemoth should approach using cover or with protective shielding to get into an optimal position to destroy the target. Behemoth is particularly devastating in long, open maps such as [[Yamantau]], [[Springfield]], and [[Canyon]]. |
| + | |||
| ⚫ | |||
| ⚫ | Despite its advantages, Behemoth is similar to both the [[Natasha]] and [[Fury]], having a large frame, mediocre speed, and slow agility. This means that weapons with bullet spread (machine guns and shotguns) and explosive weapons are effective and dangerous to the Behemoth. To counter these dangers, weapons with 600m-1100m range are ideal. |
||
| ⚫ | |||
| ⚫ | Behemoth is vulnerable when activating or deactivating its ability since it is slowed massively and only able to fire 2 weapons. Behemoth pilots should carefully choose their position, maximizing cover while still having the ability to target enemies out in the open. The [[Phase Shift]] module can help in mitigating Behemoth's vulnerability. |
||
| ⚫ | Despite its advantages, Behemoth is similar to both the [[Natasha]] |
||
| ⚫ | Fast and agile robots can quickly close in and circle the Behemoth, making it difficult for the Behemoth to counter them. As a precautionary countermeasure, the [[Lock-Down Ammo]] or the [[Paralysis Drone]] module would be advised. When piloting a Behemoth it is critical to keep smaller and faster robots at bay by killing them when they are in the open or keeping them suppressed and undercover by continuous fire. |
||
| ⚫ | Behemoth is vulnerable when activating |
||
| ⚫ | |||
| ⚫ | Fast and agile robots can quickly close in and circle the Behemoth, making it difficult for the Behemoth to counter them. As a precautionary countermeasure, |
||
| + | Similar to other robots with a big build, high firepower, and below average groundspeed, a Behemoth is vulnerable if it is targeted by a flanker or a brawler. To avoid this, the Behemoth should stay behind its teammates and make sure no enemy gets within a dangerous range. |
||
| ⚫ | |||
{{R|'''Threat Measure'''}} |
{{R|'''Threat Measure'''}} |
||
| − | It is the |
+ | It is one of the two robots with 4 heavy weapons useable at the same time, giving it the second highest DPS (Damage Per Second) after the Crisis, allowing the Behemoth to unleash devastating damage. |
==Possible Setups== |
==Possible Setups== |
||
These setups are recommended for the Behemoth: |
These setups are recommended for the Behemoth: |
||
| − | Each slot type is filled with only one particular weapon. For example, if a robot has 3 light all three of |
+ | Each slot type is filled with only one particular weapon. For example, if a robot has 3 light all three of those slots are filled with Pinatas, as mixing weapons of the same slot type is not advisable. |
===Close Range (300-350m)=== |
===Close Range (300-350m)=== |
||
| Line 96: | Line 102: | ||
|{{Setup|"Ancile"}} |
|{{Setup|"Ancile"}} |
||
|{{Setup|"Exodus"}} |
|{{Setup|"Exodus"}} |
||
| − | |Death Button |
+ | |Death Button (Opt. 1) |
|- |
|- |
||
|Setup 2 |
|Setup 2 |
||
| Line 114: | Line 120: | ||
|{{Setup|"Ancile"}} |
|{{Setup|"Ancile"}} |
||
|{{Setup|"Glacier"}} |
|{{Setup|"Glacier"}} |
||
| − | |Freezing Death Button |
+ | |Freezing Death Button (Opt. 1) |
| ⚫ | |||
| + | |Setup 5 |
||
| + | |{{Setup|Calamity}} |
||
| + | | |
||
| + | |{{Setup|Calamity}} |
||
| + | |Lightning Death Button |
||
| + | |- |
||
| + | |Setup 6 |
||
| + | |{{Setup|Devastator}} |
||
| + | |{{Setup|Glory}} |
||
| + | |{{Setup|Devastator}} |
||
| + | |Sonic Shotgun (Opt. 1) |
||
| + | |- |
||
| + | |Setup 7 |
||
| + | |{{Setup|Hammer}} |
||
| + | |{{Setup|Glory}} |
||
| + | |{{Setup|Hammer}} |
||
| + | |Blast Shotgun (Opt. 1) |
||
| + | |- |
||
| + | |Setup 8 |
||
| + | |{{Setup|Stake}} |
||
| + | | |
||
| + | |{{Setup|Stake}} |
||
| + | |Harpoon |
||
| + | |- |
||
| + | |Setup 9 |
||
| + | |{{Setup|Brisant}} |
||
| + | | |
||
| + | |{{Setup|Brisant}} |
||
| + | |Slowdown Shotgun |
||
|} |
|} |
||
{{CollapseEnd}} |
{{CollapseEnd}} |
||
| Line 139: | Line 175: | ||
|{{Setup|"Trident"}} |
|{{Setup|"Trident"}} |
||
|{{Setup|"Trident"}} |
|{{Setup|"Trident"}} |
||
| ⚫ | |||
| ⚫ | |||
| ⚫ | |||
| − | |||
| − | Button |
||
|- |
|- |
||
|Setup 3 |
|Setup 3 |
||
| + | |{{Setup|Avalanche}} |
||
| + | |{{Setup|Avalanche}} |
||
| + | |Russian Death Button 2 |
||
| + | |- |
||
| + | |Setup 4 |
||
|{{Setup|"Viper"}} |
|{{Setup|"Viper"}} |
||
|{{Setup|"Viper"}} |
|{{Setup|"Viper"}} |
||
|Pesticide |
|Pesticide |
||
| + | |- |
||
| + | |Setup 5 |
||
| + | |{{Setup|"Zeus"}} |
||
| + | |{{Setup|"Zeus"}} |
||
| + | |God of Thunder |
||
| + | |- |
||
| + | |Setup 6 |
||
| + | |{{Setup|Dragoon}} |
||
| + | |{{Setup|Dragoon}} |
||
| + | |Plasma Cannon |
||
| + | |- |
||
| + | |Setup 7 |
||
| + | |{{Setup|Hel}} |
||
| + | |{{Setup|Hel}} |
||
| + | |Freezing Lightning Death Button |
||
| + | |- |
||
| + | |Setup 8 |
||
| + | |{{Setup|Incinerator}} |
||
| + | |{{Setup|Incinerator}} |
||
| + | |Hellfire |
||
| + | |- |
||
| + | |Setup 9 |
||
| + | |{{Setup|Smuta}} |
||
| + | |{{Setup|Smuta}} |
||
| + | |Homing Machine Gun |
||
| + | |- |
||
| + | |Setup 10 |
||
| + | |{{Setup|Decay}} |
||
| + | |{{Setup|Decay}} |
||
| + | |Radioactive Plasma Cannon |
||
| + | |- |
||
| + | |Setup 11 |
||
| + | |{{Setup|Cestus}} |
||
| + | |{{Setup|Cestus}} |
||
| + | |Blast Grenade Launcher |
||
|} |
|} |
||
{{CollapseEnd}} |
{{CollapseEnd}} |
||
| − | |||
===Long Range (800-1,100m)=== |
===Long Range (800-1,100m)=== |
||
| Line 172: | Line 244: | ||
|- |
|- |
||
|Setup 2 |
|Setup 2 |
||
| + | |{{Setup|"Trebuchet"}} |
||
| + | |{{Setup|"Trebuchet"}} |
||
| + | |Christmas Tree |
||
| + | |- |
||
| + | |Setup 3 |
||
|{{Setup|"Tempest"}} |
|{{Setup|"Tempest"}} |
||
|{{Setup|"Tempest"}} |
|{{Setup|"Tempest"}} |
||
|Gunship |
|Gunship |
||
|- |
|- |
||
| − | |Setup |
+ | |Setup 4 |
|{{Setup|"Flux"}} |
|{{Setup|"Flux"}} |
||
|{{Setup|"Flux"}} |
|{{Setup|"Flux"}} |
||
| + | |Death Star |
||
| − | |Deathstar |
||
|- |
|- |
||
| − | |Setup |
+ | |Setup 5 |
|{{Setup|"Gauss"}} |
|{{Setup|"Gauss"}} |
||
|{{Setup|"Gauss"}} |
|{{Setup|"Gauss"}} |
||
|Railgun |
|Railgun |
||
| + | |- |
||
| + | |Setup 6 |
||
| + | |{{Setup|Prisma}} |
||
| + | |{{Setup|Prisma}} |
||
| + | |Stronger Death Star |
||
| + | |- |
||
| + | |Setup 7 |
||
| + | |{{Setup|Reaper}} |
||
| + | |{{Setup|Reaper}} |
||
| + | |Defense Breach Revolver Cannon |
||
|} |
|} |
||
{{CollapseEnd}} |
{{CollapseEnd}} |
||
===Overview=== |
===Overview=== |
||
| − | Due to its |
+ | Due to its large frame, mediocre speed, slow flexibility and lack of shielding, the use of the Behemoth as a close-range brawler can be a double edged sword. While the damage from four heavy weapons can create a potentially devastating ''insta-kill'' robot, the (shorter) reload times of many short or mid-range weapons on other (shielded) robots make use of Behemoth as a brawler a high risk/high reward option. However, an aggressive or even 'Kamikaze' style-of-play using 4 short/mid-range weapons (i.e. Avenger, Smuta, Avalanche, Calamity, Ember, Exodus, Glacier, Hel, Decay, Dragoon, Redeemer, Glory, Devastator, Hammer, Stake or Brisant) can make the Behemoth a fearsome opponent. Furthermore, whilst mass mounting is common and often recommended, the use of two reaper on the permanent slots and two trebuchet on the ability slots can be effective at long range. |
===Not Recommended=== |
===Not Recommended=== |
||
| − | *The use of the [[Nashorn]] |
+ | *The use of the [[Nashorn]], [[Kang Dae]] and [[Zenit]] are not recommended due to the relatively low damage the the inability to bypass Aegis Shields, with many robots in the current meta (as of 2023) having Stealth or Aegis Shields, which enables them to block sniper fire at range. |
| − | *However, at |
+ | **However, at '''{{Col|{{WRColor|MK3}}|MK3}}''' (and with the [[Effect: Shieldbreaker|Shieldbreaker]] effect, additional [[Pilot Skills|Pilot skills]] and other damage bonuses), 4 Nashorns or Kang Does can be a '''3 to 5 shot robot killer''' as they can ignore energy/Aegis shields and decrease HP by a lot with a single volley. |
| − | *The use of the [[Thunder]] and [[Glory]] are not recommended due to bullet spread of each weapon's shotgun-like nature. The use of the [[Calamity]] is also not recommended. |
||
| − | *The Zeus is also not recommended as a brawler as the [[Zeus]] has a low DPS, and after 2 shots the [[Behemoth]]'s ability will run out, and if opponents have [[tempest]] or [[avenger]] you will probably be destroyed. |
||
| + | ==Upgrade Cost== |
||
| + | {{Robot Tier4}} |
||
| + | * NOTE: base level starts at level 1 cost is <!--10,000 {{Cp icon}} --> |
||
| + | * MK2 Upgrade cost 500 {{Au icon}} |
||
| + | ==Stats== |
||
| + | {{MasterRobot|Behemoth}} |
||
| + | <!-- |
||
==Mark I Statistics== |
==Mark I Statistics== |
||
{{Robot Upgrades |
{{Robot Upgrades |
||
| Line 236: | Line 328: | ||
|total-upgrade-cost = 197,500,000 |
|total-upgrade-cost = 197,500,000 |
||
|total-upgrade-time = 38 days}} |
|total-upgrade-time = 38 days}} |
||
| + | --> |
||
| − | |||
==Gallery== |
==Gallery== |
||
| + | {{Gallery - Resize Notice}} |
||
| − | <gallery position="center" orientation="none" spacing=" |
+ | <gallery position="center" orientation="none" spacing="small" widths="200" captionalign="center" captionsize="small" bordercolor="#d235ca" bordersize="small"> |
| − | |||
| − | Behemoth.jpg|Behemoth |
+ | Behemoth Dragoon.jpg|Behemoth official poster |
| + | War Robots 5.3 Final Teaser (Behemoth, Phantom & First Operation!)|Behemoth official teaser |
||
| − | |||
| + | War Robots Overview- Behemoth & Phantom (NEW ROBOTS) -2019-|Behemoth official overview |
||
| + | Behemothstronk.PNG|Behemoth armed with quad [[Dragoon|Dragoons]] and dual [[Glacier|Glaciers]], [[Redeemer|Redeemers]] & [[Flux|Fluxes]] as seen in [[Hawk|Hawk's]] official overview |
||
| + | HawkBehemoth.jpg|Behemoth armed with quad [[Hawk]] superlasers as seen in a 2021 skirmish |
||
</gallery> |
</gallery> |
||
| Line 249: | Line 344: | ||
! scope="col" |Version |
! scope="col" |Version |
||
! scope="col" |Changes |
! scope="col" |Changes |
||
| + | |- |
||
| + | |[[Updates#Update 8.7.0|8.7.0]] |
||
| + | |Movement speed is decreased by 5 km/h <br> Durability is decreased by 10%. |
||
| + | |- |
||
| + | |[[Updates#Update 7.9|7.9]] |
||
| + | |Now can walk in Siege Mode (-50% speed in Siege mode) |
||
| + | |- |
||
| + | |[[Updates#Update 7.0.0|7.0.0]] |
||
| + | |New limited edition model: [[Behemoth/Ardent Behemoth|Ardent Behemoth]] |
||
|- |
|- |
||
|[[Updates#Update 6.0.1|6.0.1]] |
|[[Updates#Update 6.0.1|6.0.1]] |
||
| Line 260: | Line 364: | ||
|- |
|- |
||
|[[Updates#Update 5.3.0|5.3.0]] |
|[[Updates#Update 5.3.0|5.3.0]] |
||
| − | |New skin: [[Paint Jobs#Loader|Loader]]<br |
+ | |New skin: [[Paint Jobs#Loader|Loader]]<br>Robot was added to the game |
|} |
|} |
||
==Trivia== |
==Trivia== |
||
*In other references, a "Siege mode" is a protective mode. |
*In other references, a "Siege mode" is a protective mode. |
||
| + | *When entering Siege Mode, the Behemoth cannot be pushed back by Arthur or Minos' blast and charge abilities. |
||
*The name fits the robot well: the definition of "behemoth" is having a monstrous size, power, and appearance. |
*The name fits the robot well: the definition of "behemoth" is having a monstrous size, power, and appearance. |
||
*This robot was added on August 14, 2019. |
*This robot was added on August 14, 2019. |
||
| + | *This was the first robot to use 4 heavy weapons at once (The second one being [[Crisis]]). |
||
==Navigation== |
==Navigation== |
||
{{Units}} |
{{Units}} |
||
[[Category:A to Z]] |
[[Category:A to Z]] |
||
| + | [[Category:Heavy Robot]] |
||
Latest revision as of 16:32, 18 February 2024
| THIS IS A COMMUNITY PAGE IT IS OPEN TO EDITS FROM ANYONE |  |
| Behemoth | Ardent Behemoth |

| “ | The first robot able to fire 4 heavy weapons simultaneously. Developed by the DSC corporation, it's the true embodiment of unparalleled firepower
|
” |
- — in-game description
| QUICK NAVIGATION | ||||
|---|---|---|---|---|
| << PREV | Fenrir | T | Phantom | NEXT >> |
| 55 | Behemoth
|
| Purchase Information | 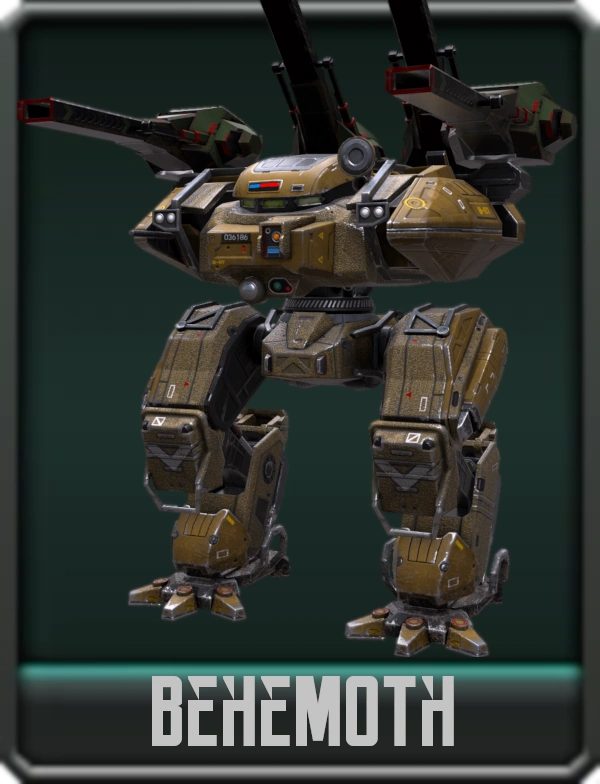
| ||||
|---|---|---|---|---|---|
| In-Game Cost | Real Value |
Exp Level | |||
| 10,000 14,000 |
$140 | 20 | |||
| Robot Information | |||||
| Class |
Ability |
Faction | |||
Medium |
Siege Mode |
DSC | |||
| Base Statistics | |||||
Level |
Durability |
Speed | |||
| 1 | 128,380 | 34 kph | |||
| Armaments | Standard Paint Jobs | ||||
| Hardpoints | 4x Heavy | ||||
| Default Weapons | 4x Kang Dae | ||||
| Module Slots | Legendary Paint Jobs | ||||
| Active | Yes | ||||
| Passive | 3 | ||||
| Other | Legendary Pilots | ||||
| Tier |
IV | 
| |||
| Wiki Class |
Heavy | ||||
| Potential Role | Attacker | ||||
| Workshop Production Information | |
|---|---|
| 1 Day Cost |
3 Day Cost |
| 290,000 | 950,000 |
| Components |
Components |
| 60 | 170 |
Introduction
The Behemoth is a medium robot with 4 heavy hardpoints. It is unofficially classified as a heavy robot based on wiki criteria. Despite the high health and the high firepower, the behemoth is a slow target..
Abilities
This robot's ability is named Siege Mode. Upon activation, Behemoth becomes 50% slower, and moves its 2 heavy Weapons in the middle upright to it's firing position, being able to fire 4 heavy weapons simultaneously after 3 seconds of the ability activation. 4 heavy weapons is unprecedented in War Robots, providing high damage output, sometimes even being able to one-shot kill enemies with high damage per shot weapons such as the Thunder, Glory, Devastator, Stake, Brisant, Trebuchet, Zeus, Thermite, Dragoon, Redeemer, Gauss, Decay and Hornet.
The deactivation of the ability takes 3 seconds, in reverse order: upon deactivating, Behemoth loses the ability to fire its 2 middle heavy weapons, then 3 seconds later Behemoth is more mobile again.
Strategy
Behemoth has high health and immense firepower, so players engaging an enemy Behemoth should approach using cover or with protective shielding to get into an optimal position to destroy the target. Behemoth is particularly devastating in long, open maps such as Yamantau, Springfield, and Canyon.
Behemoth is one of the two robots with a toggle-able ability that slows the robot's movement when activated. The others are Fujin and Weyland.
Despite its advantages, Behemoth is similar to both the Natasha and Fury, having a large frame, mediocre speed, and slow agility. This means that weapons with bullet spread (machine guns and shotguns) and explosive weapons are effective and dangerous to the Behemoth. To counter these dangers, weapons with 600m-1100m range are ideal.
Behemoth is vulnerable when activating or deactivating its ability since it is slowed massively and only able to fire 2 weapons. Behemoth pilots should carefully choose their position, maximizing cover while still having the ability to target enemies out in the open. The Phase Shift module can help in mitigating Behemoth's vulnerability.
Fast and agile robots can quickly close in and circle the Behemoth, making it difficult for the Behemoth to counter them. As a precautionary countermeasure, the Lock-Down Ammo or the Paralysis Drone module would be advised. When piloting a Behemoth it is critical to keep smaller and faster robots at bay by killing them when they are in the open or keeping them suppressed and undercover by continuous fire.
Behemoth should be used to support a squad by taking out other mid- to long-range bots and weakening enemy tanks. If using Quantum Radar, the Behemoth is a great counter to stealth bots such as the Crisis.
Similar to other robots with a big build, high firepower, and below average groundspeed, a Behemoth is vulnerable if it is targeted by a flanker or a brawler. To avoid this, the Behemoth should stay behind its teammates and make sure no enemy gets within a dangerous range.
Threat Measure
It is one of the two robots with 4 heavy weapons useable at the same time, giving it the second highest DPS (Damage Per Second) after the Crisis, allowing the Behemoth to unleash devastating damage.
Possible Setups
These setups are recommended for the Behemoth:
Each slot type is filled with only one particular weapon. For example, if a robot has 3 light all three of those slots are filled with Pinatas, as mixing weapons of the same slot type is not advisable.
Close Range (300-350m)
| Slot Types | Heavy Slot (Side Set) (Opt. 1) | Heavy Slot (Side Set) (Opt. 2) | Heavy Slot (Middle Set) | Name (if applicable) |
|---|---|---|---|---|
| #Slots | x2 | x2 | x2 | |
| Setup 1 |  |
 |
|
Death Button (Opt. 1) |
| Setup 2 |  |
|
Plasma Death Button | |
| Setup 3 |  |
|
Inferno | |
| Setup 4 |  |
|
|
Freezing Death Button (Opt. 1) |
| Setup 5 |  |
|
Lightning Death Button | |
| Setup 6 |  |
|
Sonic Shotgun (Opt. 1) | |
| Setup 7 |  |
|
Blast Shotgun (Opt. 1) | |
| Setup 8 | Harpoon | |||
| Setup 9 |  |
|
Slowdown Shotgun |
Mid-Range (500-600m)
| Slot Types | Heavy Slot (Side Set) | Heavy Slot (Middle Set) | Name (if applicable) |
|---|---|---|---|
| #Slots | x2 | x2 | |
| Setup 1 |  |
|
Leadhose |
| Setup 2 |  |
|
Russian Death Button |
| Setup 3 | Russian Death Button 2 | ||
| Setup 4 |  |
|
Pesticide |
| Setup 5 |  |
|
God of Thunder |
| Setup 6 |  |
|
Plasma Cannon |
| Setup 7 |  |
|
Freezing Lightning Death Button |
| Setup 8 |  |
|
Hellfire |
| Setup 9 | Homing Machine Gun | ||
| Setup 10 |  |
|
Radioactive Plasma Cannon |
| Setup 11 | Blast Grenade Launcher |
Long Range (800-1,100m)
| Slot Types | Heavy Slot (Side Set) | Heavy Slot (Middle Set) | Name (if applicable) |
|---|---|---|---|
| #Slots | x2 | x2 | |
|
Setup 1 |
 |
|
Heavy Sniper |
| Setup 2 |  |
|
Christmas Tree |
| Setup 3 |  |
|
Gunship |
| Setup 4 |  |
|
Death Star |
| Setup 5 |  |
|
Railgun |
| Setup 6 |  |
|
Stronger Death Star |
| Setup 7 | Defense Breach Revolver Cannon |
Overview
Due to its large frame, mediocre speed, slow flexibility and lack of shielding, the use of the Behemoth as a close-range brawler can be a double edged sword. While the damage from four heavy weapons can create a potentially devastating insta-kill robot, the (shorter) reload times of many short or mid-range weapons on other (shielded) robots make use of Behemoth as a brawler a high risk/high reward option. However, an aggressive or even 'Kamikaze' style-of-play using 4 short/mid-range weapons (i.e. Avenger, Smuta, Avalanche, Calamity, Ember, Exodus, Glacier, Hel, Decay, Dragoon, Redeemer, Glory, Devastator, Hammer, Stake or Brisant) can make the Behemoth a fearsome opponent. Furthermore, whilst mass mounting is common and often recommended, the use of two reaper on the permanent slots and two trebuchet on the ability slots can be effective at long range.
Not Recommended
- The use of the Nashorn, Kang Dae and Zenit are not recommended due to the relatively low damage the the inability to bypass Aegis Shields, with many robots in the current meta (as of 2023) having Stealth or Aegis Shields, which enables them to block sniper fire at range.
- However, at MK3 (and with the Shieldbreaker effect, additional Pilot skills and other damage bonuses), 4 Nashorns or Kang Does can be a 3 to 5 shot robot killer as they can ignore energy/Aegis shields and decrease HP by a lot with a single volley.
Upgrade Cost
|
| ||||||||||||||||||||||||||||||||||||||||||||||||||||||||||||||||||||||||||||||||||||||||||||||
- NOTE: base level starts at level 1 cost is
- MK2 Upgrade cost 500

Stats
| ID | 55 | Ability | Faction | |||||||||||||||||||||||||||||||||||||||||||||||||||||||||||||||||||||||||||
|---|---|---|---|---|---|---|---|---|---|---|---|---|---|---|---|---|---|---|---|---|---|---|---|---|---|---|---|---|---|---|---|---|---|---|---|---|---|---|---|---|---|---|---|---|---|---|---|---|---|---|---|---|---|---|---|---|---|---|---|---|---|---|---|---|---|---|---|---|---|---|---|---|---|---|---|---|---|---|
| Tier | 4 |  Siege Mode |
 DSC | |||||||||||||||||||||||||||||||||||||||||||||||||||||||||||||||||||||||||||
| Class | Medium | |||||||||||||||||||||||||||||||||||||||||||||||||||||||||||||||||||||||||||||
| Wiki Class |
Heavy | |||||||||||||||||||||||||||||||||||||||||||||||||||||||||||||||||||||||||||||
| Availability | ||||||||||||||||||||||||||||||||||||||||||||||||||||||||||||||||||||||||||||||
| ||||||||||||||||||||||||||||||||||||||||||||||||||||||||||||||||||||||||||||||
Gallery
Images may have been resized to fit in the page. Click on an image to view actual size.
")
 (18 KB)")
 -2019- (43 KB)")
")
")
Update History
| Version | Changes |
|---|---|
| 8.7.0 | Movement speed is decreased by 5 km/h Durability is decreased by 10%. |
| 7.9 | Now can walk in Siege Mode (-50% speed in Siege mode) |
| 7.0.0 | New limited edition model: Ardent Behemoth |
| 6.0.1 | Now available for 14,000 gold (can still be produced via Workshop 2.0) |
| 5.8.0 | New limited edition skin: Sapphire (Icarus Cyber Show) |
| 5.7.0 | New limited edition skin: Komainu (Lunar New Year 2020) |
| 5.3.0 | New skin: Loader Robot was added to the game |
Trivia
- In other references, a "Siege mode" is a protective mode.
- When entering Siege Mode, the Behemoth cannot be pushed back by Arthur or Minos' blast and charge abilities.
- The name fits the robot well: the definition of "behemoth" is having a monstrous size, power, and appearance.
- This robot was added on August 14, 2019.
- This was the first robot to use 4 heavy weapons at once (The second one being Crisis).